How to Publish App on Google Play: Complete Step-by-Step Guide
Updated: July 6, 2025
So, you've built an incredible Android app with NextNative and you're eager to get it into the hands of users worldwide. That's fantastic! But before you pop the champagne, there's a crucial step: navigating the Google Play Store submission process.
Getting your app published isn't just about uploading a file. It’s about presenting your app professionally to both Google's review team and your future users. Let's walk through everything you need to have squared away before you even log into your developer console. A little prep work here goes a long way, trust me.
Your Pre-Launch Checklist for a Smooth Submission#
Think of this as your pre-flight check. Rushing into the Google Play Console without having all your assets and information ready is a recipe for frustration and delays. I've seen it happen time and again. You end up scrambling for a missing screenshot or frantically writing a privacy policy while the submission form times out.
Let’s get everything organized first. By gathering all the necessary pieces upfront, you’ll turn a potentially stressful task into a smooth, step-by-step process.
The Table of Contents: Your Essential Assets#
First things first, let's talk about the "content" of your store listing. These are the visuals and text that will sell your app to potential users. They're your first, and often only, chance to make a great impression.
To make this super simple, I've put together a quick-reference table of everything you'll need. Have these items ready in a dedicated folder on your computer.
Essential Pre-Publishing Assets#
| Asset/Information | Required Specs/Format | Why It's Important |
|---|---|---|
| App Icon | 512x512 pixels, 32-bit PNG | This is your app's face. It appears in search results, on the user's home screen, and everywhere in between. Make it count! |
| Feature Graphic | 1024x500 pixels, JPG or 24-bit PNG | This is the banner at the top of your store listing. It's prime real estate for branding and grabbing attention. |
| Screenshots | At least 2 (4-8 recommended), JPG or PNG | Shows your app in action. This is how you demonstrate key features and prove your app is worth the download. |
| Privacy Policy URL | A publicly accessible web link | Non-negotiable if your app collects any data. Google will reject your app without this. It shows users you respect their privacy. |
| App Title & Descriptions | Plain text | Your short description (80 chars) and long description (4000 chars) are key for SEO and explaining your app's value. |
| Android App Bundle (AAB) | The .aab file from your build |
This is the actual app package you'll upload. Google now requires the AAB format, not the older APK. |
Having these assets ready is half the battle. It means you can focus on the submission process itself without getting sidetracked by creative or administrative tasks.
The Nitty-Gritty: Admin and Legal Stuff#
Okay, with the creative assets handled, let's tackle the administrative side of things. These are the non-negotiable requirements from Google.
First up, you'll need a Google Play Developer account. This requires a one-time $25 registration fee. Think of it as a small investment to show you're a serious developer and to help Google keep the platform clean. You’ll need a standard Google Account to get started.
One of the most common stumbling blocks I see is the privacy policy. If your app collects any user data—and almost every app does, even for basic analytics—you absolutely must have a privacy policy. This just needs to be a simple page on your website with a public URL. Don't skip this.
Finally, you need the app itself, packaged and ready to go. The entire mobile app development process leads to this moment: creating a signed Android App Bundle (AAB). Platforms like NextNative make generating this file pretty straightforward, but it's the final, critical artifact you need before you can upload anything to the store.
Setting Up Your Google Play Developer Account#
Alright, with all your pre-launch assets polished and ready, it's time to stake your claim on the Google Play Store. The first real step on this journey, and one you absolutely can't skip, is creating your Google Play Developer Account.
Think of it as getting the keys to your new storefront. The process itself is pretty simple. You'll sign up using a Google Account and pay a one-time $25 registration fee. This isn't just a random charge; it’s a small barrier to entry that helps Google ensure developers are serious about their apps, which ultimately creates a safer store for everyone.
Once your payment goes through and Google verifies your account, you're in! You’ll get full access to the Google Play Console, which is basically mission control for your app.
Getting to Know the Google Play Console#
Jumping into the Console for the first time can feel like a lot to take in, but don't worry, you'll get the hang of it quickly. This dashboard is where you'll manage your app's entire life—from the initial setup and testing all the way to tracking its performance after launch.
No one expects you to be a pro on day one. If you're just starting out and want a bird's-eye view, our guide on mobile app development for beginners offers a great primer before you get into the nitty-gritty of the console.
For now, just focus on getting familiar with these main areas:
- App Setup: This is your starting point. You'll define the basics here, like what your app does, who it's for, and its content rating.
- Release Management: Here's where the magic happens. You’ll upload your app files (called bundles), run tests with small groups or the public, and finally, push the "go live" button.
- Analytics & Reporting: This section will become your best friend once your app is out in the wild. It’s packed with data on downloads, user activity, crash reports, and more.
Getting comfortable in this environment is vital. Remember, you're stepping into a massive marketplace. The Google Play Store has over 3.3 million apps, and according to Google Play Store statistics on appinventiv.com, about 41,000 new ones are added every single month. In a space this crowded, a well-managed presence can make all the difference.
Your Google Play Developer account is more than just a login; it’s your identity as a publisher. The name you choose will be publicly visible on your app's store page, so pick a professional and recognizable name for yourself or your company.
This initial setup isn't just about ticking boxes. It's about establishing your brand as a developer. Take some time to click around, explore the different menus, and get a feel for the powerful tools at your fingertips. Building that confidence now will pay off big time as you move on to the next steps.
Getting Your App Ready and Signed for Release#
Alright, with your developer account ready to go, it's time to get into the nitty-gritty of packaging your app. This part can feel a bit technical, but it's a crucial step in getting your app onto Google Play. We're going to create something called a signed Android App Bundle (AAB), which is the standard format Google now requires for all new apps.
If you've been around the Android world for a while, you might remember the old APK files. Google has moved everyone over to the AAB format for a pretty smart reason. An AAB bundles up all your app's code and resources, but then it lets the Play Store do the heavy lifting of creating optimized downloads for each specific user. This little trick can lead to smaller app sizes and has been shown to boost install rates by up to 15%. For those of us using NextNative, turning a project into a functional app is the first big milestone. If you want a deeper dive on that, check out our guide on how to turn your web skills into a mobile app.
This image lays out the first few gates you have to pass through to get into the Google Play Console, which is your mission control for publishing.
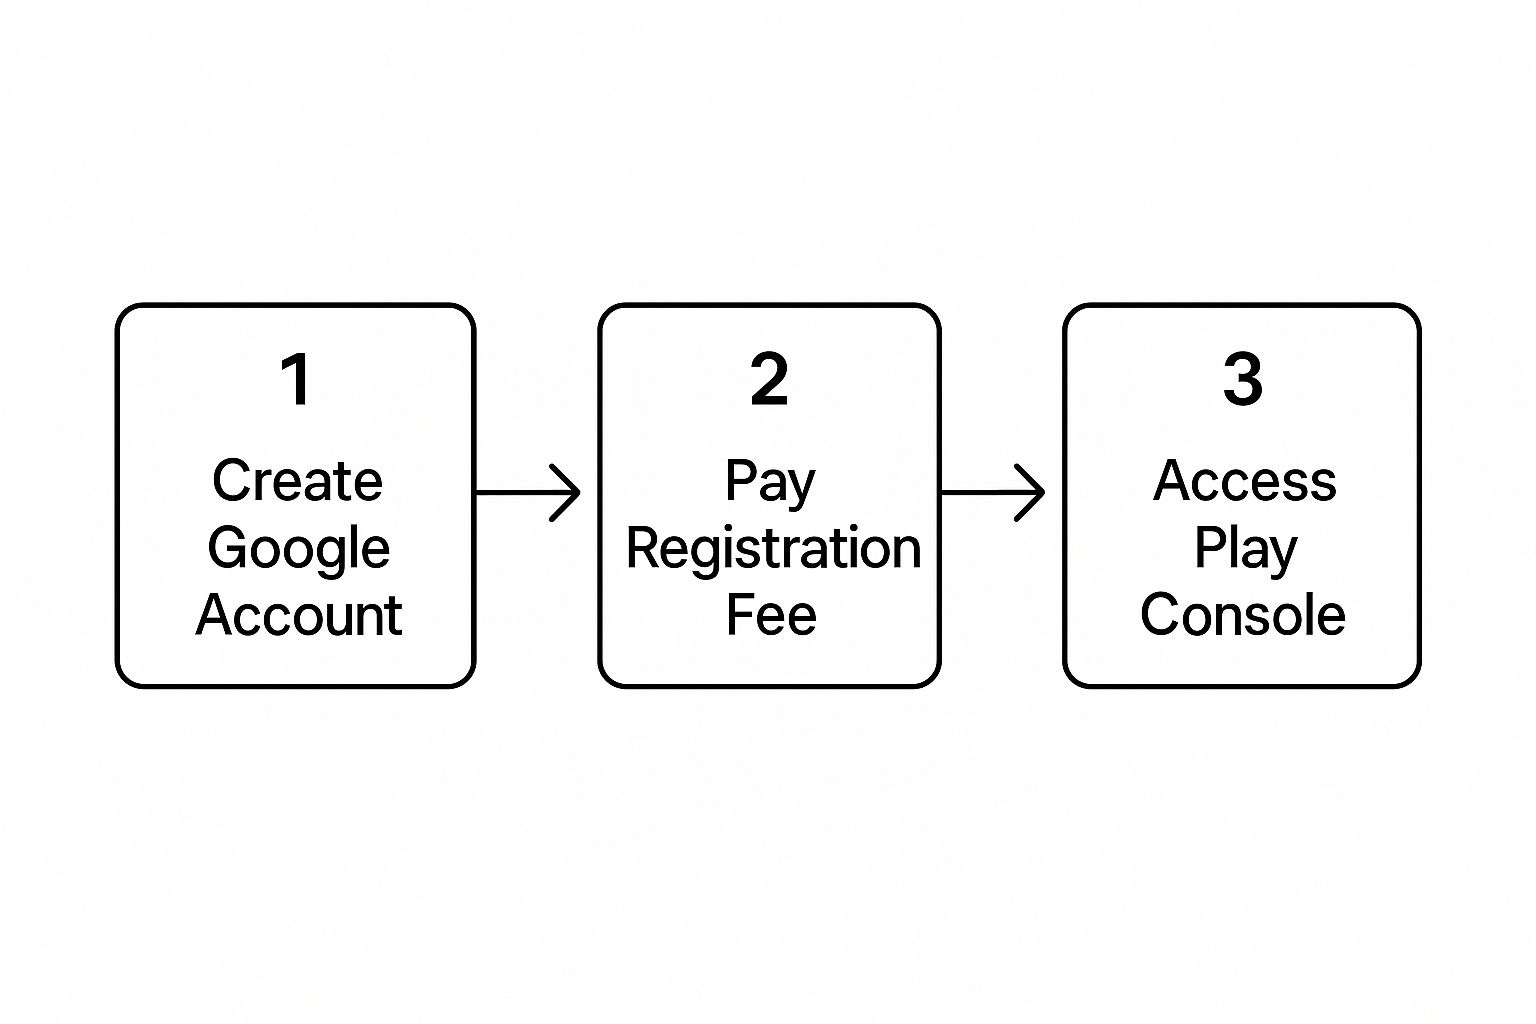
It’s a simple flow—get an account, pay the one-time fee, and you're in. Every single developer on the platform starts right here.
Create Your App's Digital Signature#
Before you can build that AAB, you need to forge your app’s digital signature, which is stored in a release keystore. Think of this keystore as your app's unique, unforgeable fingerprint. It's a special file that cryptographically proves you are the one and only developer. This is how Google confirms that an update is actually from you and not from someone trying to impersonate you.
This signature is everything when it comes to security and identity. Every single update you push for your app has to be signed with this exact same key.
Seriously, Don't Lose This: If you lose your keystore, you will NEVER be able to update your app again. I'm not kidding. You'd have to publish it as a completely new app, which means losing all your users, your hard-earned ratings, and every review. Back it up in multiple, super-secure places. Think password-protected cloud storage and an external drive stored somewhere safe.
To create the keystore, you'll need to run a command-line tool. It will ask you to set up a password for the keystore and another one for its key alias. Guard these passwords with your life.
Generating the Signed App Bundle#
Once your keystore is created and you've backed it up securely, you’re ready to generate the final signed AAB file. Whether you're using Android Studio or a build command, you'll point the process to your keystore file and enter the passwords you just created.
The build process will then take your NextNative application, compile it, and stamp it with your digital signature. The result is a single file, usually ending in .aab. This is the golden ticket you'll upload to the Google Play Console.
So, what did we just accomplish?
- Authentication: You've proven you own the app.
- Integrity: You've guaranteed the app's code hasn't been messed with.
- Readiness: Your app is now perfectly packaged for Google to distribute.
With that signed AAB file in hand, you've officially conquered the most technical part of this whole process. Now, the fun begins—let's head over to the Google Play Console and start building the store listing that will introduce your app to the world.
Crafting a Google Play Store Listing That Actually Gets Downloads#
Alright, you’ve got your signed AAB file tucked away safely. Now, it's time to take off your developer hat and put on your marketing hat. Your Google Play Store listing is basically your app's digital storefront, and for most people, it’s the only chance you’ll get to convince them your app is worth a tap on that 'Install' button.
Just filling in the blanks won’t cut it. Think of every field as a chance to tell a story and show people exactly how your app makes their life better. A thoughtfully crafted listing isn’t just a hoop to jump through; it's a huge part of learning how to publish an app on Google Play that people will actually find and use. This directly impacts how visible your app is and how many downloads you get.
Writing Descriptions That Sell#
Your app's title and descriptions are your secret weapons for App Store Optimization (ASO), which is essentially SEO but for the app stores. It's how people will discover your app in the first place. You have two main text fields to play with, and they each serve a very different purpose.
First up is the short description. You only get 80 characters, so this is your elevator pitch. It’s the first thing users see, often before they even click to see more details. It needs to be punchy and focused on the benefits. For instance, a productivity app could say, "Organize your life in minutes. Syncs across all your devices."
Then you have the long description, which gives you a generous 4,000 characters to really dive into the details. My advice? Don't just list a bunch of features. Instead, explain how those features solve a real problem for the user. Use short paragraphs and bullet points to make it easy to skim. This is also the perfect place to naturally work in your most important keywords to help your search ranking.
Your Visuals Do the Heavy Lifting#
Let's be honest, people judge a book by its cover, and they judge an app by its visuals. Before anyone reads a single word of your description, their eyes will dart to your icon, feature graphic, and screenshots. High-quality, professional-looking visuals build instant trust and communicate what your app does in a split second.
- Feature Graphic (1024x500 px): Think of this as your app's billboard. It needs to be eye-catching and on-brand. Steer clear of cramming it with text; a powerful image that captures the essence of your app's experience works much better.
- Screenshots: Google Play requires at least two, but from my experience, uploading 4-8 screenshots is the sweet spot. Don't just take random captures of your app in action. Curate them to tell a visual story, walking users through the best features. I always add short text captions on top to highlight the key benefit in each shot.
- App Icon (512x512 px): This little square is your brand's identity on a user's phone. It has to be clean, memorable, and look good on any wallpaper.
Your store listing isn't just an administrative task; it's your most powerful marketing tool. I've seen studies showing that simply improving screenshots and other visual assets can boost conversion rates by over 25%. It's absolutely worth spending the extra time to get this part right.
Choosing Your Category and Getting Rated#
Last but not least, you need to tell Google where your app fits in. Picking the right category—like 'Productivity', 'Entertainment', or 'Health & Fitness'—is crucial for helping Google's algorithm show your app to the right audience. Choose the one that best describes what your app actually does at its core.
You'll also need to fill out the content rating questionnaire. This is a pretty straightforward process where you answer a series of questions about your app's content. Be honest here. Getting the rating wrong can get your app pulled from the store. Once you're done, Google will assign an official rating (like PEGI 3 or Everyone 10+), which helps users, especially parents, make informed choices. This final step ensures your app is presented responsibly to everyone.
Making It Through the App Release and Review Gauntlet#

Alright, you've made it to the final hurdle. With your signed AAB file in hand and a polished store listing, you're on the verge of handing your creation over to Google. This is the moment you shift from building and preparing to actually shipping.
Your first move inside the Google Play Console is a strategic one: choosing the right release track. This isn't just a technical step; it's a decision that can make or break your launch.
Choosing Your Release Track#
Before you unleash your app on the world, you absolutely have to test it in a real-world environment. Thankfully, Google gives you a structured way to do this, helping you catch those sneaky bugs and gather feedback before your big debut.
- Internal Testing: Think of this as your inner circle. You can add up to 100 testers who get the app almost instantly. It's perfect for those quick sanity checks with your immediate team and QA folks.
- Closed Testing: This is where you bring in a wider, but still controlled, group. You can invite trusted beta testers via email or Google Groups. This track is golden for getting honest feedback on new features from people who are invested but not on the payroll.
- Open Testing: Feeling brave? With open testing, anyone on Google Play can find your app and join the test. They can't leave a public review, but they can send you private feedback. Your app will have a clear "Early Access" tag, managing user expectations.
- Production: This is the big one. When you release to production, your app is live for everyone to download in the countries you’ve targeted.
For a first-time launch, a battle-tested strategy is to start with Internal testing, then graduate to a small Closed test. If you want more feedback, dip your toes into an Open test before finally hitting that big green Production button.
The Final Checks and Submission#
Okay, before you click "Send for review," take a deep breath and do one last sweep. Seriously, double-check your store listing for typos—they look unprofessional. Make sure your screenshots are the right ones for the build you're uploading.
Most importantly, be certain your app aligns with Google's policies. I can't stress this enough. Take some time to explore the official app store review guidelines; they cover all the common pitfalls that get apps rejected.
Google's review process isn't just about whether your app crashes. It’s a deep dive into security, privacy, and user experience to protect the entire Play Store ecosystem.
The bar for getting published on Google Play is higher than ever, especially regarding user security. In recent years, Google has removed millions of apps for policy violations like sneaky data collection or misleading claims. For us developers, this means being transparent about permissions, practicing clean coding, and just being ethical is non-negotiable. If you want to dig deeper into these trends, check out these insights on Google Play policies.
Once you feel good about everything, it's time to upload your AAB file to your chosen track and hit that submission button.
After you submit, your app's status will flip to "In review." Now comes the waiting game. Review times can be anything from a few hours to several days, especially for new developers. You can keep an eye on things right in the Google Play Console. Patience is your best friend here; a thorough review is a good thing for everyone.
Common Questions About Publishing on Google Play#
Getting ready to launch your app is exciting, but it's totally normal for some last-minute questions to pop up. You’re on the home stretch, and understanding what’s ahead can make the final push a lot smoother.
Let's walk through some of the most common things developers ask right before hitting that "publish" button. Knowing the answers will help you set realistic expectations and sidestep any common pitfalls.
How Long Does Google Play Take to Review an App?#
This is the big one, and the honest answer is: it varies. If you’re a new developer submitting your very first app, you should plan for a review time of anywhere from 3 to 7 days, and sometimes even longer. Don’t get caught off guard by this.
What causes the wait? Several things. If your app is in a sensitive category—think finance, health, or anything aimed at kids—it’s going to get a much closer look. Another common hiccup is login credentials. If your app requires a login, you must provide valid test account details. Forgetting this is a surefire way to get delayed.
On the other hand, if you're an established developer with a good publishing history, your reviews can sometimes be surprisingly fast, often clearing in less than 24 hours.
Pro Tip: I've learned this the hard way: never, ever promise stakeholders a hard launch date until your app is officially approved. Always build in a buffer of at least one week to your timeline. It'll save you a world of stress.
What Are the Most Common Reasons for App Rejection?#
Getting rejected is a bummer, but it's usually avoidable. The fastest ticket to rejection is violating the Google Play Developer Program Policies. More often than not, it’s the simple things that trip people up.
Many rejections aren't even about the app's code but its store listing. Making misleading claims about what your app does or using a famous brand's name or logo in your icon will get you flagged almost instantly.
Here are a few other frequent culprits:
- Missing or Vague Privacy Policy: If your app collects any user data, you need a clear, easy-to-find privacy policy linked directly from your store listing. No exceptions.
- Broken Functionality: Test, test, and test again. An app that crashes on certain devices or popular Android versions is an easy rejection.
- Repetitive Content: Your app needs to feel unique and provide real value. If it's just a slightly different version of another app already out there, Google might reject it for being repetitive.
Can I Update My App After It Is Published?#
Of course! In fact, you absolutely should. Publishing your app isn't the finish line; it's the starting pistol. Regular updates are how you keep users happy, fix bugs, and add cool new features based on their feedback.
The update process is pretty much the same as your first submission. You’ll just build a new signed Android App Bundle (AAB) with an incremented version code, upload it to your Play Console, and write up some "What's New" notes to let users know what you've changed.
Updates usually get reviewed much faster than new apps, but they still have to pass the same policy checks. Following mobile development best practices from the start will make every update cycle that much smoother.
Ready to turn your web project into a polished mobile app without the headache of native development? With NextNative, you can use your existing Next.js skills to build and launch production-ready iOS and Android apps, saving you weeks of setup time. Check out NextNative and start building today!