A Friendly Guide to Google OAuth 2 Implementation
Updated: October 8, 2025

If you've ever signed into a new app using your Google account, you've seen Google OAuth 2 in action. It’s the industry-standard way to let third-party apps securely access a user's Google data without ever asking for their password.
Think of it like a digital valet key. You're not handing over your master keys; you're just granting specific, limited permissions for a short time.
Why Google OAuth 2 Is a Must-Have for Modern Apps#
That seamless, secure login experience is what users now expect. Instead of juggling yet another username and password, they just click a button, grant permission, and they're in. This simple flow protects both you and your users in a big way.
Your app never sees, handles, or stores the user's Google password. This dramatically cuts down your security liability and is a core part of building a trustworthy app. We cover this and other key principles in our guide on mobile authentication best practices.
For users, it’s all about control. They know they can revoke your app's access at any time right from their Google account settings, which gives them the confidence to sign up in the first place.
The Core Concepts Explained#
To really get how it works, you need to know a few key terms. These are the building blocks of every single Google OAuth 2 integration, so getting familiar with them now will make the rest of this guide much clearer.
Here’s a quick rundown of the main concepts you'll be working with.
Core Google OAuth 2 Concepts at a Glance#
| Concept | What It Is | Why It Matters for Your App |
|---|---|---|
| Access Token | A temporary key your app gets after the user says yes. | This token is your ticket to make authorized API calls on the user's behalf. It's short-lived for security. |
| Scopes | The specific permissions your app is asking for. | This lets you be transparent. You might ask for the email scope but not the drive scope, for example. |
| Consent Screen | The pop-up Google shows, asking the user for approval. | This is where you build trust. A clear consent screen is crucial for getting users to sign up. |
Getting these right is the difference between a smooth login and a confusing one that scares users away.
The scale here is massive. Google OAuth 2 is the backbone for a huge chunk of the internet's single sign-on (SSO) experiences. While exact numbers are private, just think about Google's own products—Gmail alone has over 1.5 billion active users, and a huge number of them use OAuth 2 to connect to other apps. It's a proven, battle-tested system.
By delegating authentication to a trusted provider like Google, you offload immense complexity and risk. You're not just implementing a login button; you're adopting a battle-tested security infrastructure trusted by billions.
Setting Up Your Project in the Google Cloud Console#
Your first stop on the road to Google OAuth 2 is the Google Cloud Console. Think of it as mission control for the entire integration. Before you write a single line of code, you have to get a project properly configured so your app can talk to Google's authentication services.
This step is foundational. Without a project, you can't enable the right APIs or generate the credentials your app desperately needs. Getting this right from the start saves a ton of headaches down the road. It's more than a technical chore; it's about giving your app a clear identity within the Google ecosystem.
Creating Your First Project#
Once you land in the console, the first job is to create a new project. Give it a name that makes sense, something like "NextNative Mobile App" or "My Awesome SaaS." This is just for you, and it helps keep things organized if you end up managing a few different projects.
With your project created, head over to the API Library. This is where you'll switch on the specific Google APIs your app needs. For user authentication, the Google People API is a common choice, as it lets you pull basic profile info like the user's name and email after they give you the green light.
Pro Tip: Only enable the APIs you absolutely need. Sticking to the principle of least privilege from day one isn't just a security best practice—it also keeps your project's scope clean and simple.
Polishing the OAuth Consent Screen#
After flipping on your APIs, the most critical configuration step is setting up the OAuth consent screen. This is the screen your users will see when they first connect your app to their Google account. It's your one and only chance to make a good first impression and build trust.
Here’s a look at the dashboard where you'll be managing all these settings.

This dashboard is the central hub for your project's APIs, billing, and monitoring, making it the command center for your entire Google OAuth 2 setup.
To create a consent screen that looks professional and trustworthy, you’ll need to provide a few key things:
- App name: The official name of your application.
- User support email: An address where users can get help.
- App logo: A high-quality logo reinforces your brand.
- Links to your Privacy Policy and Terms of Service: These are non-negotiable for building user trust and are almost always required by Google.
This framework is incredibly popular. The standard Google OAuth 2 is built on, OAuth 2.0, is used by over 16,000 organizations worldwide. With so many companies relying on this tech, users expect a polished and professional consent experience.
Getting this screen right is crucial for conversion. A sloppy or incomplete screen can make users think twice before granting access. Once you have this configured, you'll be ready to generate your API credentials—the next step in getting your Google OAuth client ID.
Creating and Securing Your OAuth 2 Credentials#
Alright, with your project and consent screen configured, it’s time to generate the keys to the kingdom: your OAuth 2.0 credentials.
This means creating a Client ID and a Client Secret. Think of the Client ID as a public username for your app, while the Client Secret is the password. It's incredibly sensitive, and protecting it is your top priority.
You'll get these from the "Credentials" tab in your Google Cloud Console project. Google will prompt you to choose an application type, a decision that directly impacts your app's security model. Don't just click through this part—it's important.
Choose the Right Credential Type#
Picking the right application type is critical for a secure setup. Here’s a quick rundown to help you decide which OAuth 2.0 credential is right for your project.
Credential Types and Their Use Cases#
| Credential Type | Best For | Key Security Consideration |
|---|---|---|
| Web application | Apps running on a server (like a Next.js backend). | This is our choice. It allows the Client Secret to be securely stored on your backend, away from prying eyes. |
| Android/iOS | Native mobile applications built specifically for those platforms. | Designed for flows where you can't safely store a Client Secret on a user's device. |
| Chrome App | Applications that run within the Chrome browser ecosystem. | Follows a specific security model tailored for Chrome extensions and apps. |
Since a NextNative app has both a client-side part (the mobile app) and a server-side backend, "Web application" is the correct choice. It’s the only way to properly secure that all-important Client Secret.
Protecting Your Client Secret#
This brings me to the single most important rule of google oauth 2: never, ever expose your Client Secret in your client-side code.
If you embed it in your mobile app's source, it can be easily extracted by anyone who downloads it. A bad actor could then impersonate your application, redirect your users to phishing sites, or make unauthorized API calls on their behalf. It's a disaster waiting to happen.
The only safe place for your Client Secret is on your server, stored securely as an environment variable. To keep your OAuth 2 secrets and other sensitive data locked down, you absolutely need to follow modern secrets management best practices.
Your Client Secret is as sensitive as your database password. Treat it with the same level of caution. A leak can compromise your entire application and its users, so keeping it out of the frontend is non-negotiable.
Configure Authorized Redirect URIs#
Finally, as you're creating your credentials, Google will ask you to specify your Authorized Redirect URIs. This is a crucial security whitelist.
It tells Google the exact locations it’s allowed to send users back to after they’ve granted consent. If an authentication request comes with a redirect URI that isn't on this approved list, Google will flat-out block it.
This simple step shuts down a common attack where a user could be sent to a malicious site with their authorization code. Proper URI configuration is a simple yet powerful way to safeguard your entire authentication flow.
For a deeper look into protecting these kinds of credentials, check out our guide on https://nextnative.dev/blog/securing-api-keys.
With your project set up and credentials tucked away safely on your backend, it’s time for the fun part: writing the code that actually handles the google oauth 2 flow.
The process is a bit like a well-choreographed dance. You’ll guide your user over to Google to give their permission, then gracefully catch them on their way back to your app, where they’ll arrive with a special one-time code.
Let’s walk through the steps. We'll build a specific URL, send the user there, handle their return, and then swap that temporary code for a powerful access token. That token is the key you'll use to unlock the user's profile data and officially log them in.
Building the Authentication URL#
First up, you need to construct the URL that sends your user to Google's consent screen. This isn't just a simple link; it's a carefully crafted request that tells Google exactly who your app is and what permissions it needs. This URL is built by adding several key query parameters.
Your backend code is responsible for putting this URL together. Here are the essential pieces you'll need:
client_id: The public identifier for your app that you got from the Google Cloud Console.redirect_uri: This has to be one of the exact URIs you whitelisted earlier. It tells Google where to send the user back after they've made their choice.response_type=code: This tells Google you're using the Authorization Code Flow, which is the most secure method for web and mobile apps. It means Google will send back a temporary authorization code, not the token itself.scope: A space-separated list of permissions you’re requesting. For a simple login,openid profile emailis the standard and safest combination to start with.
This infographic gives you a great high-level view of the whole process, from the user's initial login click to your server successfully getting the access token.
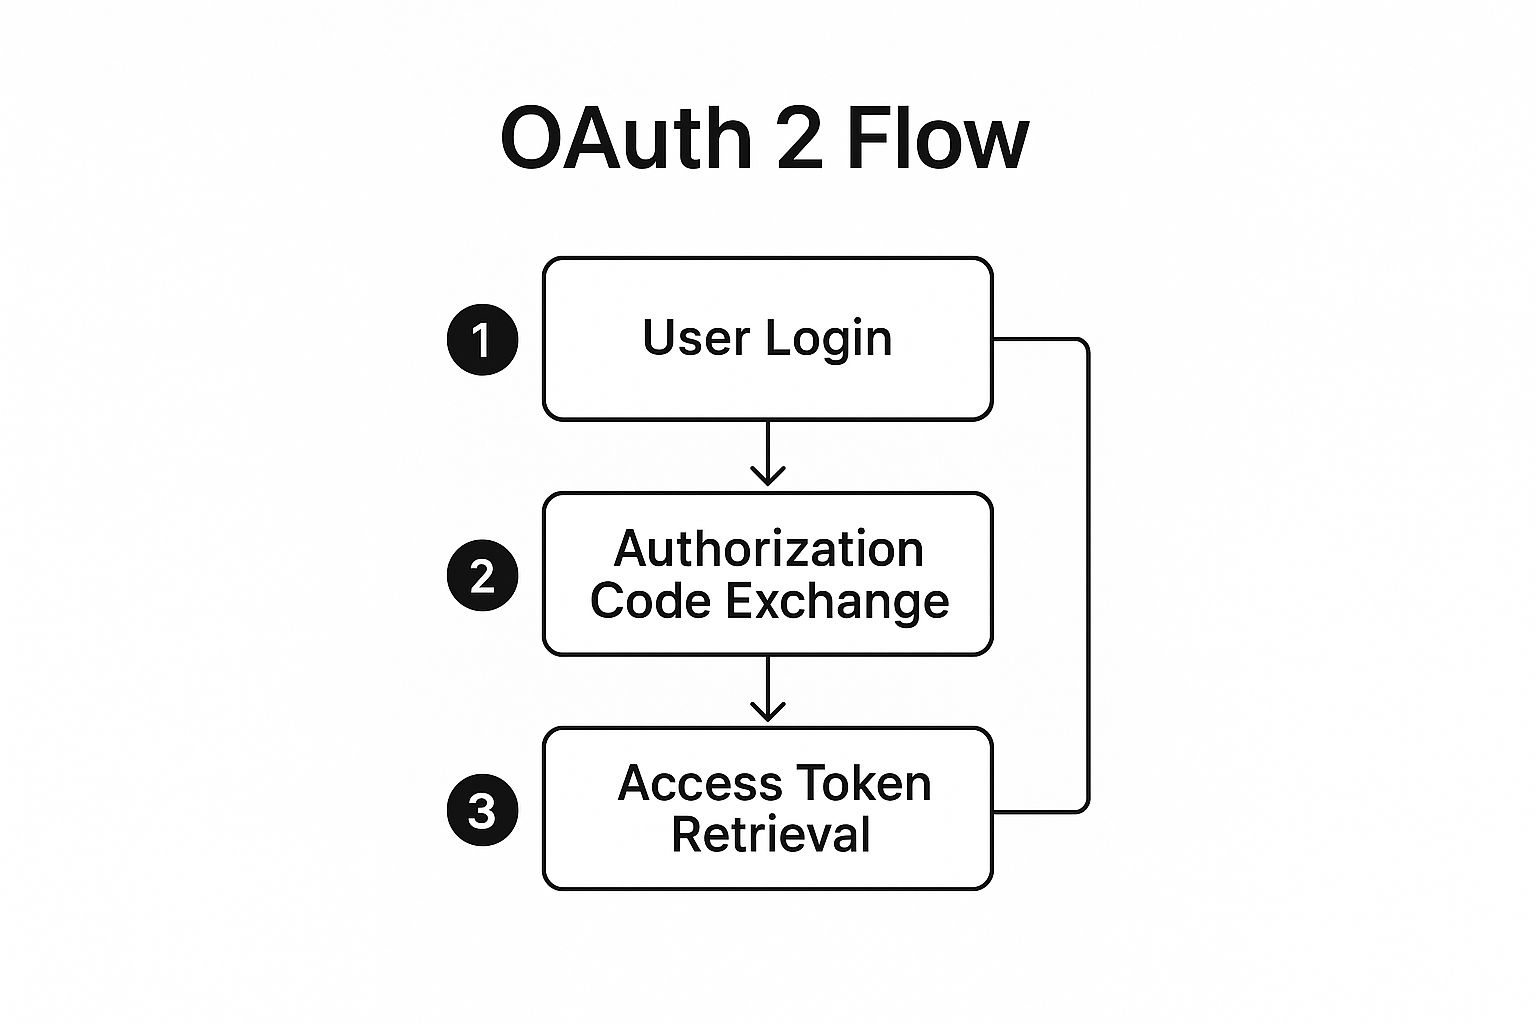
As you can see, it’s a three-part journey: the user kicks things off, your app gets a temporary code, and then your backend securely trades that code for the real access token.
Redirecting the User and Handling the Callback#
Once that URL is built, your app sends the user to it. At this point, they’ve left your application and landed on Google's familiar consent screen. There, they'll see your app's name, logo, and the specific permissions you asked for.
If the user clicks "Allow," Google redirects them right back to the redirect_uri you provided. But here’s the important part: tacked onto the end of that URL is a query parameter named code. This is the temporary authorization code you need for the final step.
Crucial Insight: This authorization code is not the access token. Think of it as a single-use, short-lived voucher that proves the user just granted your app permission. Its only job is to be exchanged for an access token in a secure, server-to-server call.
Your backend needs to be listening at that redirect URI, ready to catch this request, pull the code out of the URL, and get ready for the token exchange.
Trading the Code for an Access Token#
This final step happens entirely on your server, far away from the user's browser or device. Your backend will make a secure POST request directly to Google’s token endpoint. This is a critical security step because it’s where your Client Secret finally makes its appearance.
Your server sends another bundle of parameters to Google, which includes:
- The
codeyou just received. - Your
client_id. - Your
client_secret. - The same
redirect_urifrom the initial request. grant_type=authorization_code.
Because this request contains your Client Secret, it proves to Google that the request is legitimately coming from your application. If everything checks out, Google's server responds with a JSON object containing the access_token and, in many cases, a refresh_token.
With that access token in hand, you can now make authenticated API calls to fetch the user's profile information and complete the login process within your app. For a detailed walkthrough, you can explore our complete guide on implementing Google social login.
Managing User Sessions and Refresh Tokens#
Successfully authenticating a user with Google OAuth 2 is a huge milestone, but honestly, it's only half the battle. Now comes the real work: managing their session to keep them logged in without creating a security mess. This is where your access token and refresh token become your most important assets.
The access token is your short-term key to the kingdom, letting you make authenticated API calls on the user's behalf. You'll need to store it somewhere your app can get to it quickly, but remember, it's sensitive information. For a NextNative app, the standard approach is to tuck it away in a secure, encrypted storage solution right on the device.
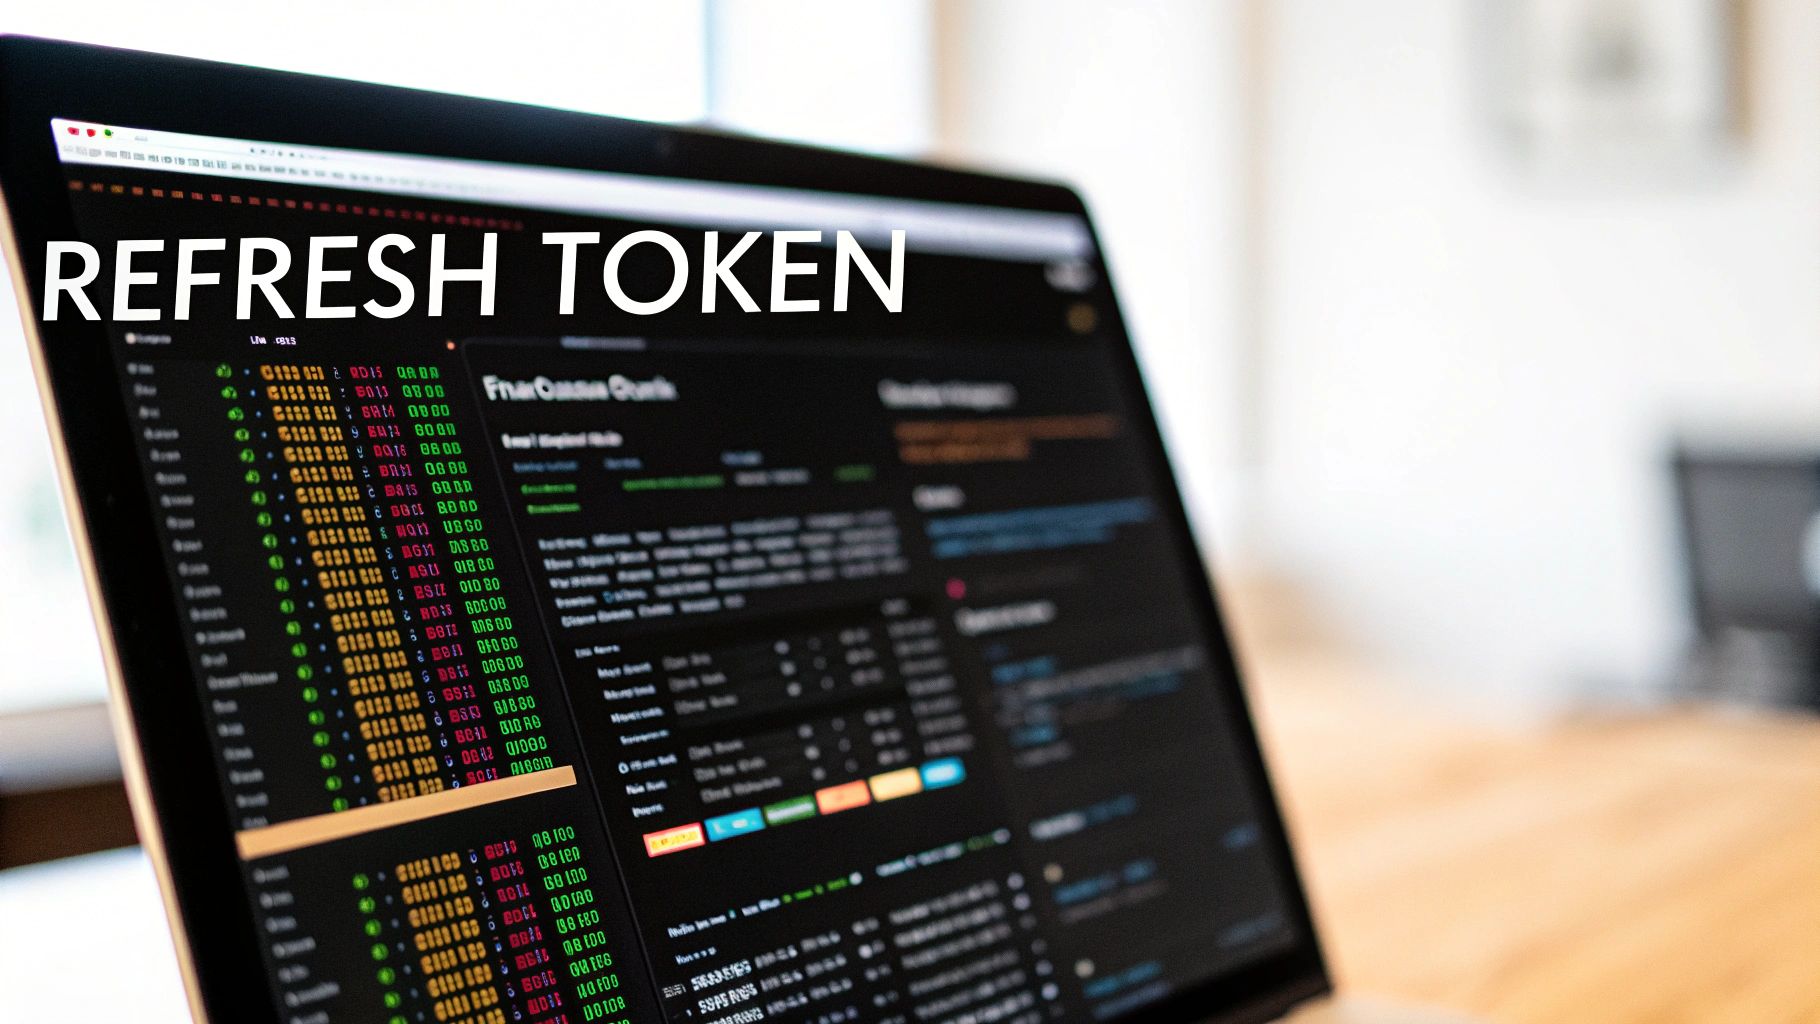
But here's the catch: access tokens expire, usually after about an hour. Forcing a user to log back in every 60 minutes would be a disaster for user experience. That’s why the refresh token is so critical; it’s your golden ticket to a seamless, long-lasting user session.
Keeping Sessions Alive with Refresh Tokens#
The refresh token is a special, long-lived credential you get right alongside the access token. Its one and only job is to fetch a new access token when the old one gives up the ghost. You should store this token very securely on your server, tightly linked to the user's account. Never on the client.
When an API call eventually fails with an "invalid token" error, your app needs to handle it gracefully in the background.
Here's how that dance typically goes:
- Your mobile client gets a 401 Unauthorized error from the API.
- It sends a quiet request to your backend, signaling that the token needs a refresh.
- Your server grabs the user's stored refresh token and makes a secure, server-to-server call to Google's token endpoint.
- Google checks the refresh token and, if valid, issues a shiny new access token.
- Your server sends this new token back down to the client, which can now retry the failed API call without missing a beat.
This entire process should be completely invisible to the user. It's the magic that keeps them logged in for days or even weeks. To see how this fits into the bigger picture, check out our deep dive on using the Google OAuth API.
A robust session management strategy isn't just about convenience; it's about reliability. By properly handling token refreshes, your application can recover from expired sessions automatically, creating a much more stable and professional user experience.
Building a Secure Logout Function#
Finally, a complete user session needs a secure exit. A proper logout function does more than just clear local data on the device; it formally terminates the session with Google. This involves two key actions: revoking the token and then clearing the local session.
Your logout logic should trigger a call to your backend, which then makes a request to Google's revocation endpoint using the user's refresh token. This tells Google that your app no longer needs access, and as a bonus, the user will see it removed from their "Apps with access to your account" page. Only after a successful revocation should you wipe all tokens and user data from the device.
This approach is part of an evolving identity landscape. While Google OAuth 2 remains a cornerstone for third-party integrations, the industry is shifting. Google recently announced that 800 million Google accounts now use passkeys, a newer, passwordless option that has driven over 2.5 billion sign-ins. You can discover more insights about this trend on the FIDO Alliance website.
Common Questions About Google OAuth 2#
Once you get into the weeds of implementing Google OAuth 2, you're bound to hit a few tricky spots. It's a powerful system, but some of its concepts can feel a bit abstract at first.
Let's clear up some of the most common questions developers run into. Getting these ideas straight will save you a ton of headaches and help you build a much more secure and reliable sign-in flow for your users.
Authentication vs. Authorization#
One of the first things that trips people up is the difference between authentication and authorization. The terms sound similar, but they mean very different things, and the distinction is crucial.
Think of it like this:
- Authentication is about identity. It answers the question, "Who are you?" When a user signs in with their Google account, you're authenticating them—confirming they are who they say they are.
- Authorization is about permissions. It answers the question, "What are you allowed to do?"
Technically, Google OAuth 2 is an authorization framework. You’re asking Google for permission (authorization) to access a piece of the user's data. We cleverly use this for authentication by requesting access to their basic profile info. Once Google gives us their verified name and email, we've effectively authenticated them.
How to Choose the Right Scopes#
Another big question is which scopes to ask for. The golden rule here is simple: the principle of least privilege. Only request the permissions you absolutely need for your app to do its job.
If you just need to log someone in and get their name and profile picture, the openid, email, and profile scopes are all you need.
Asking for access to a user's Google Drive or Calendar just to sign them up is a massive red flag. It creates suspicion and friction, and it's a great way to get your app flagged during Google's review process.
Always start with the bare minimum scopes required. You can always ask for more permissions later if a new feature needs it, but you can't undo the bad first impression of asking for way too much upfront.
What Happens If a Refresh Token Is Revoked#
A refresh token isn't a lifetime pass. A user can revoke your app's access at any time from their Google account settings, and when they do, your refresh token becomes useless instantly.
The next time your backend tries to use that revoked token to get a new access token, Google's server will flat-out reject it with an error.
Your app has to be ready for this. A graceful failure is non-negotiable. When your backend detects an invalid refresh token, it needs to kick off a clear sequence of events:
- Recognize the token has been revoked based on the error from Google.
- Immediately invalidate the user's session in your own database.
- Signal to the client-side app that the user needs to be logged out.
This flow ensures the user is prompted to re-authenticate and grant permission again, which establishes a brand new, valid session. It's a critical part of maintaining a secure and predictable experience for your users.
Ready to stop wrestling with configurations and start shipping? NextNative gives you a production-ready boilerplate with Google OAuth 2, user sessions, and native mobile features already built-in. Check out the toolkit at https://nextnative.dev and launch your app in record time.