Push Notifications Ionic: Complete Guide to Boost Engagement
Updated: August 21, 2025

If you want to keep users coming back to your Ionic app, you're in the right place. Adding push notifications is one of the single most effective ways to boost engagement and keep people opening your app long after they first install it.
This guide will walk you through getting it all set up.
Why Bother With Push Notifications?#
Push notifications are your direct line to users when they aren't actively scrolling through your app. Think of it as a friendly tap on the shoulder—perfect for delivering timely alerts that can dramatically increase how often people come back. You could let someone know about a flash sale in your e-commerce app or that a friend just sent them a new message.
This isn’t just a hunch; the numbers are pretty compelling. Sending just one notification to a new user within their first week can boost retention by a staggering 71%. These timely pings work, helping turn casual visitors into loyal fans. You can see more compelling data in these push notification retention statistics from Business of Apps.

Ultimately, a smart notification strategy just creates a better, more connected experience for your users. Before we dive into the code, you can get a feel for the basics by checking out the official https://docs.nextnative.dev/features/push-notifications.
Setting Up Your Firebase and APNs Foundation#
Before a single notification can pop up on a user's screen, you need to get the backend plumbing right. This all starts with Firebase Cloud Messaging (FCM), Google's cross-platform service that acts as the delivery engine for both your Android and iOS users.
First things first, head over to the Firebase console and create a new project. Once you're in, you'll need to grab your server key and download two critical files: the google-services.json for Android and the GoogleService-Info.plist for iOS. Don't lose these; they're what tells your app how to talk to Firebase.
For iOS, there's one more hoop to jump through: the Apple Push Notification service (APNs). You'll need to log into your Apple Developer account, create an APNs key, and then upload it back into your Firebase project. This simple upload is what connects the two services, allowing FCM to route notifications through Apple's servers to your iOS users. Getting this flow right is just as important for the user journey as a well-designed onboarding flow.
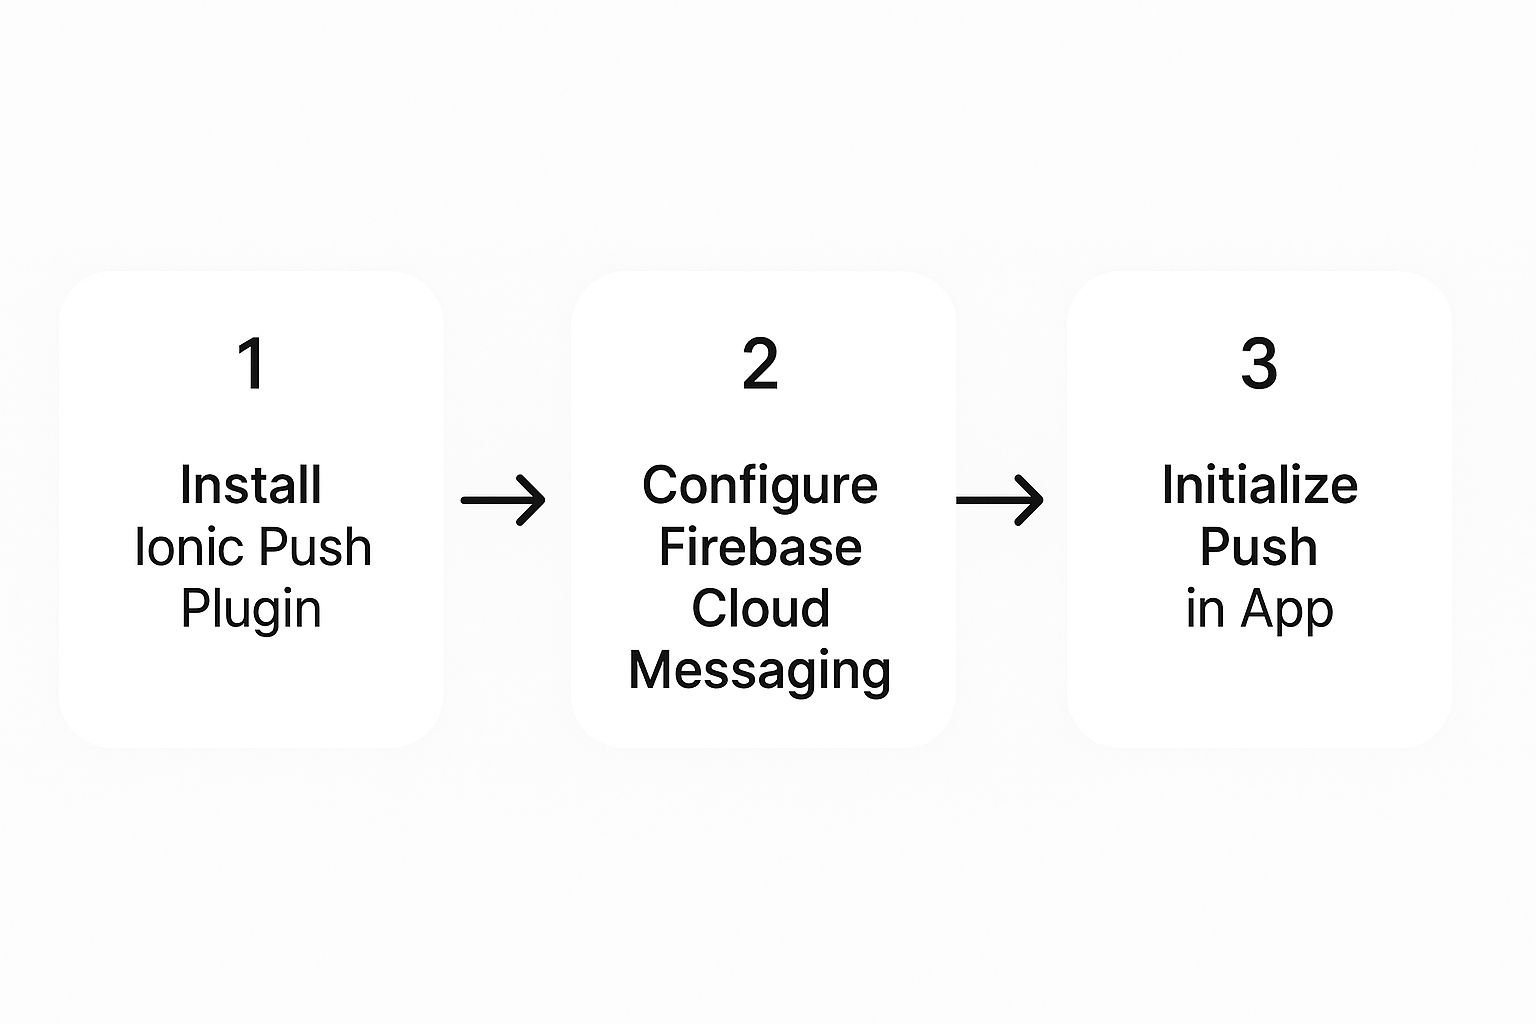
This diagram breaks down the entire process, from installing the plugin to getting everything configured and firing up notifications inside your app.

As you can see, a successful setup is all about connecting the dots—your app, the Capacitor plugin, and your backend services—in the correct sequence.
Time for the fun part—wiring up push notifications in your Ionic app. We're going to install and set up the official Capacitor Push Notifications plugin, which is the essential bridge connecting your app to both FCM and APNs.
This all starts in your terminal. You'll add the plugin package, then sync it up with your native iOS and Android projects.
From there, the real magic happens inside your app.component.ts file. This is where you'll initialize the plugin right when the app launches, register the user’s device to receive push notifications, and get that all-important unique device token.
Quick tip from experience: always request permission before you try to register the device. A good user experience starts with asking politely. It also dramatically improves your chances of getting that crucial opt-in, especially on iOS where users are prompted explicitly.

If you want to see a full example of this plugin in action, our guide on how to https://docs.nextnative.dev/tutorials/ship-in-5-minutes is the perfect place to see it all come together quickly.
Handling Incoming Notifications in Your App#
Getting a notification to the device is just the start. The real magic happens when you decide what your app should do next.
This is where you hook into event listeners, letting you react the moment a notification arrives or, more importantly, when a user taps on it. You can grab data straight from the notification's payload, like a deep link, and instantly navigate the user to the right product page or show them a custom in-app message.
This is how you make your notifications feel genuinely helpful, not intrusive. When you tailor the message and the action, engagement can jump by nearly 59%. Throw in some rich media, and you could see click-through rates climb another 25%. You can dig into more stats on effective push notification strategies over at amraandelma.com.
Ultimately, this is the difference between a notification that gets swiped away and one that pulls a user right back into your app.
Sending Your First Test Notification#

Alright, with all the setup out of the way, it's time for the moment of truth. Let's send a test notification straight from the Firebase console to your connected device and make sure the whole pipeline is working.
First, you'll need the device's unique registration token. You should have this logging to your console whenever the app registers for push notifications ionic. Grab that token.
Now, head over to your Firebase project and navigate to the Cloud Messaging section. From there, you can start a new campaign. It will give you an option to target a specific device—just paste the token you copied.
Compose a simple message with a title and a body, then hit send.
Seeing that first alert pop up on your screen is a rewarding milestone. It’s the confirmation that your Ionic, Capacitor, and Firebase configurations are all talking to each other perfectly.
Going Beyond the Code: Best Practices for Engaging Users#
Alright, the technical heavy lifting is done. Now comes the part that actually determines if users keep your app or delete it: your notification strategy.
Blasting out generic, constant alerts is the fastest way to get uninstalled. The whole point of adding push notifications in Ionic is to deliver real value, not just make noise.
A great place to start is the opt-in prompt itself, especially on iOS where users have to say "yes" explicitly. Don't just show the default system alert. First, explain why they should opt-in. What's in it for them?
It makes a huge difference. The overall opt-in rate for push notifications is 67.5%, but that number plummets to just 43.9% on iOS where permission is actively requested. You can see a full breakdown in these push notification opt-in statistics from mobiloud.com.
My advice is to always personalize messages, segment your audience based on their behavior, and respect their time. Keep messages concise and include a clear call-to-action.
This kind of strategic thinking is a core part of learning how to build cross-platform mobile apps that people actually want to use.
Common Ionic Push Notification Questions#
I get asked a lot about the tricky parts of push notifications in Ionic. Let's clear up a couple of the most common ones.
One big question is whether you can use third-party services like OneSignal with Capacitor. The short answer is yes, you can. However, I’ve found that sticking with the official Capacitor Push Notifications plugin provides a much cleaner, more direct integration with Firebase. This direct path usually means fewer headaches with compatibility, especially as Ionic and Capacitor get updated.
Another one that always comes up is how to handle notifications when the app is completely closed. The key is listening for the pushNotificationActionPerformed event. This lets your app react the moment a user taps the notification, giving you the power to launch the app from a closed state and take them directly to a specific page or view.
Remember, a great notification system isn't just about getting the message delivered; it's about crafting a seamless user experience from start to finish. Following proven mobile app development best practices is absolutely essential to getting it right.