Build Your First Mobile App JS Project
Updated: September 15, 2025
Building a mobile app with JavaScript is no longer a niche idea—it’s a mainstream, battle-tested way to create production-ready native apps for both iOS and Android. If you're a web developer, you can get into the app stores using the skills you already have. Forget about starting over with Swift or Kotlin. This is about using powerful JavaScript frameworks to build a fantastic user experience that works everywhere.
Why Use JavaScript for Your Next Mobile App#

Ever wondered if your hard-earned web expertise could translate directly into a real mobile app? The answer is a solid yes. Choosing JavaScript isn’t just a shortcut; it's a smart, strategic move that delivers speed, efficiency, and a unified codebase.
This approach lets you plug into the massive JavaScript ecosystem, using incredible tools like Next.js for your user interface and Capacitor to bridge the gap to native device features like the camera or GPS. What you get is a true hybrid app that feels completely at home on any device.
The Power of a Single Codebase#
The core benefit here is simple but profound: write your code once, deploy it everywhere. Your Next.js application can be a high-performance website while, at the same time, being packaged as native apps for iOS and Android.
This model brings some huge advantages to the table:
- Faster Development Cycles: No need to manage separate teams or codebases for web, iOS, and Android. A single feature update automatically rolls out across all platforms.
- Consistent User Experience: Your brand identity and UI stay the same, whether a customer is on your website from a desktop or using your app on their phone.
- Simplified Maintenance: Bug fixes and updates become way easier. Pushing a change to one repository can solve an issue on every platform at once.
Imagine launching an MVP on the web, the App Store, and Google Play all at the same time, from one codebase. That's the power we're tapping into. It turns a complex, multi-platform launch into a streamlined, manageable process. You can learn more about the specifics in our detailed guide on JavaScript for mobile app development.
To put it in perspective, here's a quick look at why this approach is so effective for modern development teams.
Key Benefits of Building Mobile Apps with JavaScript#
This table breaks down the practical advantages of using Next.js and Capacitor for your mobile app project.
| Advantage | What It Means for You | Real-World Impact |
|---|---|---|
| Unified Codebase | Write your UI and business logic once in JavaScript. | A new feature or bug fix pushed to one repository is instantly ready for web, iOS, and Android, slashing development time. |
| Faster Time-to-Market | Go from concept to a multi-platform launch in a fraction of the time. | Launch your MVP simultaneously on the web and in the app stores, gathering feedback from a wider audience from day one. |
| Access to Web Talent | Tap into the world's largest pool of software developers. | It's easier to hire skilled developers and build your team since you're not searching for niche mobile-specific skillsets. |
| Massive Ecosystem | Use thousands of existing npm packages, libraries, and tools. | Solve common problems quickly without reinventing the wheel, from state management to data visualization. |
Ultimately, this strategy lets you move faster and build more with the resources you already have.
Leveraging the World's Most Popular Language#
When you build a mobile app with JavaScript, you're not just picking a language; you're aligning with the most dominant technology in software development today. JS has an unparalleled collection of libraries, frameworks, and community support ready for you to use.
This isn't some niche strategy; it’s a mainstream, battle-tested approach. The stats all point to JavaScript's central role, making it a reliable and future-proof choice for your project.
The numbers don't lie. By 2025, an estimated 63.61% of software developers worldwide will use JavaScript, cementing its spot as the most popular language on the planet. Even more telling, over 16 million companies have integrated JavaScript tools into their operations. You can dig into more of these JavaScript usage statistics on Radixweb.
This widespread adoption is your safety net. It ensures you'll always be able to find the tools, the tutorials, and the talent you need to make your project a success.
Setting Up Your Next js Project for Mobile#

Alright, time to get our hands dirty and lay down a solid foundation. This part is more than just running create-next-app. It's about architecting your project with a mobile-first mindset from the get-go. Getting this blueprint right now will save you from massive headaches down the road.
The goal here is simple: create a structure that feels natural for both web and native platforms. This means thinking about how you organize components, pages, and global styles to maximize reusability. A well-organized project ensures that when you wrap it with Capacitor, everything just works as it should.
Initializing Your Next js App#
To kick things off, we'll use the standard Next.js command-line tool. It’s the fastest way to get a modern, production-ready React framework up and running.
Pop open your terminal and run this command:
npx create-next-app@latest my-mobile-app
The installer will ask you a few questions. For a mobile-focused setup, these are the options I always go with:
- TypeScript: Absolutely, yes. The type safety it provides is invaluable, especially as your project grows.
- Tailwind CSS: Yes. Its utility-first approach is fantastic for building responsive UIs that adapt beautifully from tiny mobile screens to large desktops.
- App Router: Yes. This is the modern standard for Next.js, and its component-based structure aligns perfectly with what we're trying to achieve.
This command scaffolds a new project inside a my-mobile-app directory. If you want a more detailed walkthrough of this process, we have a comprehensive guide on how to create a Next.js app over on our blog.
Once the installation wraps up, jump into your new project directory:
cd my-mobile-app
Now you have a clean slate, perfectly configured for what comes next.
Configuring for Static Export and PWA#
This is a crucial step for integrating with Capacitor. Capacitor works by taking a folder of static web assets—your final HTML, CSS, and JavaScript—and wrapping it inside a native shell. It doesn't run a Node.js server on the device.
To make this happen, you need to tell Next.js to produce a static export. Open up your next.config.mjs file and add the output: 'export' option.
/** @type {import('next').NextConfig} */
const nextConfig = {
output: 'export',
// Recommended: Add this to disable image optimization API
// as it's not compatible with static export.
images: {
unoptimized: true,
},
};
export default nextConfig;
This one simple change tells Next.js to generate a static version of your site into an out folder whenever you run the build command. That out folder is exactly what Capacitor needs to build your mobile app js project.
By setting up for a static export from the very beginning, you're building your application in a way that's 100% compatible with the mobile environment. This helps you avoid the painful refactoring that often happens when teams try to force a server-rendered app into a client-side wrapper.
While we're at it, turning your project into a Progressive Web App (PWA) is a smart move. It gives you offline capabilities and a more app-like feel, even on the web. We can get this done by adding a manifest file and a service worker, which we'll dive into as we start integrating more native features. For now, this initial setup has all the groundwork in place.
Integrating Capacitor to Go Native#
Now for the magic moment. Your Next.js project is about to transform from a slick website into a genuine native mobile application. This is where we bring in Capacitor, the spiritual successor to Cordova, which acts as a powerful bridge between your web code and the native worlds of iOS and Android.
Think of Capacitor as a special container. It takes your statically exported Next.js app—all that HTML, CSS, and JavaScript—and wraps it in a native shell. This shell is what gives your web code access to the device's hardware, like the camera, GPS, and file system, all through a simple JavaScript API.
Installing Capacitor Dependencies#
Getting started is surprisingly straightforward. From the root of your Next.js project, you'll just need to install the Capacitor command-line interface (CLI) and its core package.
Pop open your terminal and run these two commands:
npm install @capacitor/cli --save-dev
npm install @capacitor/core
With those tools installed, the next step is to initialize Capacitor right inside your project. This command is what sets up the necessary configuration files and the native project directories for you.
npx cap init
Capacitor will then ask for your app name and a unique app ID. The ID typically follows a reverse domain name format like com.company.appname. This isn't just a formality; it's how the app stores will identify your application, so make it unique.
Configuring for Next.js#
This is the most critical part of the whole integration. You have to tell Capacitor where to find your compiled web assets. For a Next.js project that's configured for static export, this is the out directory.
Open the capacitor.config.ts file that was just created and make one crucial change: set the webDir property to 'out'.
import type { CapacitorConfig } from '@capacitor/core';
const config: CapacitorConfig = {
appId: 'com.yourcompany.yourapp',
appName: 'My Mobile App',
webDir: 'out', // Point this to your Next.js static export directory
bundledWebRuntime: false,
};
export default config;
By setting
webDircorrectly, you create a direct link between your Next.js build process and Capacitor. Every time you runnext build, the output is immediately ready to be synced into your native projects. This makes for a smooth and repeatable workflow.
This infographic gives you a bird's-eye view of the entire process, from structuring the app all the way to optimizing its final performance.
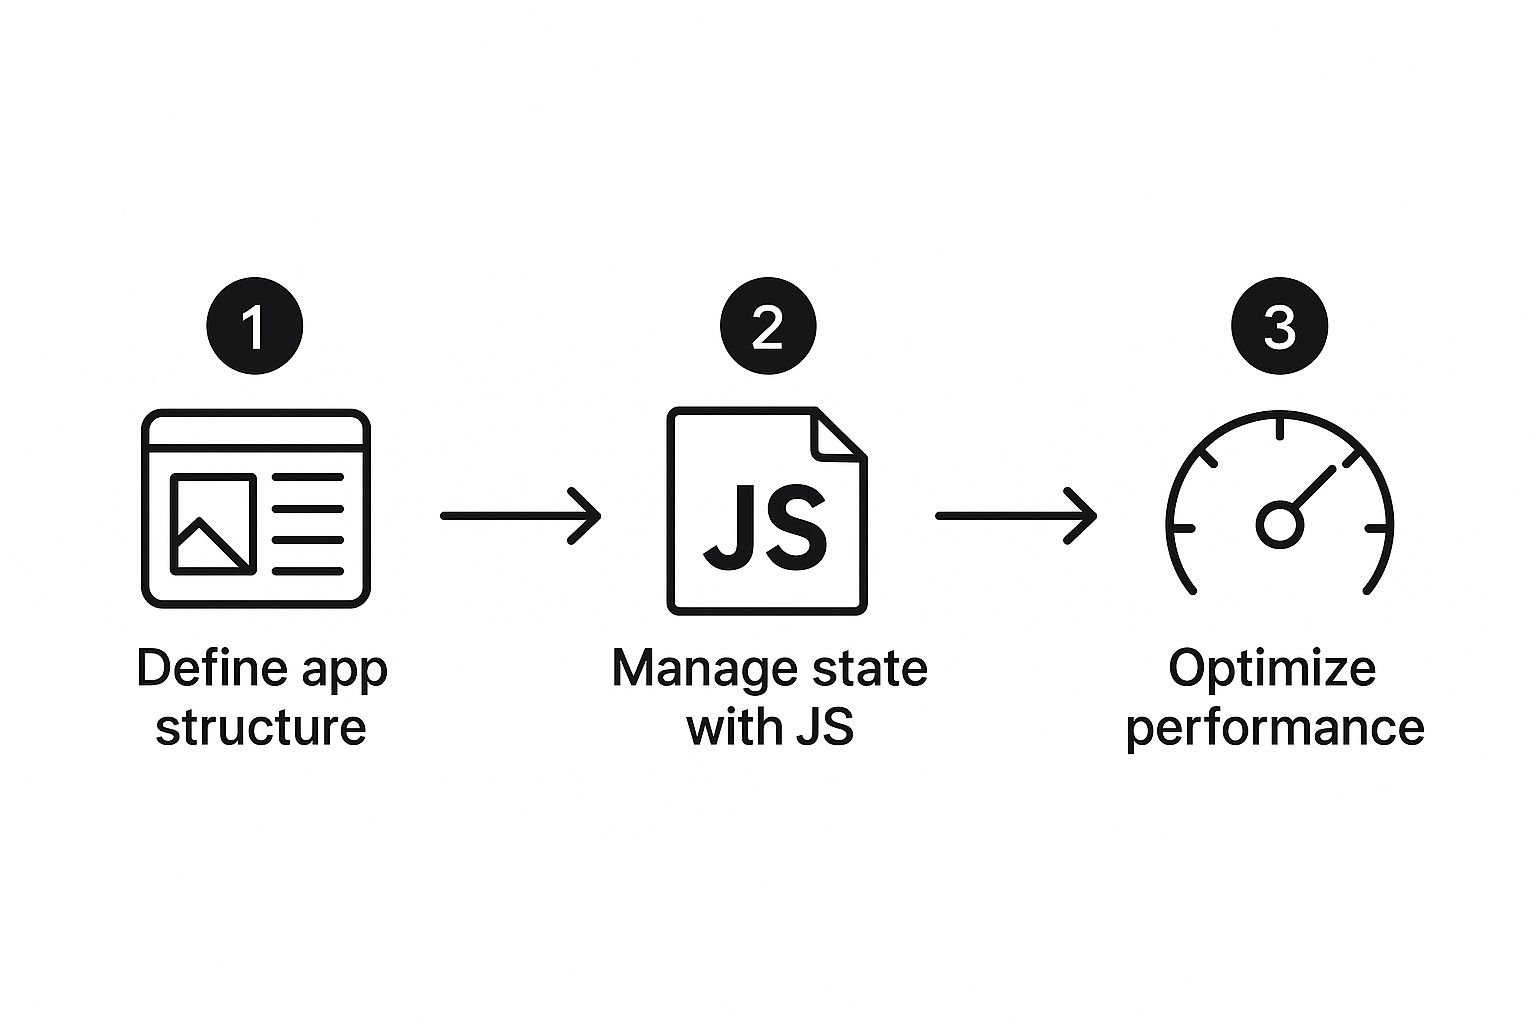
As you can see, a solid structure and clean state management are the foundations for a performant mobile experience.
Adding Native Platforms#
With the configuration complete, you can now add the native platforms you want to target.
For iOS:npx cap add ios
For Android:npx cap add android
These commands generate ios and android folders in your project root. These aren't just folders; they are complete, standalone Xcode and Android Studio projects. You now have everything you need to open, run, and build your app for simulators and physical devices. This is a big step, and our detailed tutorial on how to build a Capacitor app can guide you through any specific hurdles you might run into.
This approach of wrapping a web app is incredibly popular in the JavaScript ecosystem. While React Native has cemented its place in the market, commanding a substantial 40% market share among developers, Capacitor offers a unique advantage by allowing you to reuse your entire web UI. This is a key reason why so many developers are drawn to creating their mobile app with JS. You can explore more data on JavaScript frameworks for mobile development on moldstud.com.
Using Native Device Features in Your App#
A beautiful UI is great, but a true mobile app experience often comes from interacting with the device itself. What's a modern social app without a camera, or a delivery app without GPS? This is where your mobile app js project bridges the gap from web to native, and Capacitor makes it incredibly straightforward.
Capacitor exposes a rich set of APIs that let you call native device functions directly from your JavaScript code. This isn't a clunky, slow abstraction; it's a direct line to the hardware. You can access everything from the camera and geolocation to haptics and local notifications with just a few lines of code.
Implementing a Practical Feature: The Camera#
Let's build something tangible: a feature that lets users take a photo with their device's camera and display it on the screen. This is a common requirement for everything from profile picture uploads to document scanning.
First, you need to install the official Capacitor Camera plugin. Pop open your terminal in the project root and run this:
npm install @capacitor/camera
After the installation finishes, it's essential to sync your changes with the native projects. This command updates your iOS and Android dependencies to include the new plugin's code, making the native functions available to your web code.
npx cap sync
With the plugin installed and synced, you can now use it directly inside any React component.
Calling Native Functions from React#
Let's create a simple React component that triggers the camera. We'll import the Camera object from the Capacitor plugin, call its getPhoto method, and then display the resulting image. It's surprisingly simple.
import { Camera, CameraResultType } from '@capacitor/camera';
import { useState } from 'react';
const PhotoTaker = () => {
const [imageUrl, setImageUrl] = useState('');
const takePicture = async () => {
try {
const image = await Camera.getPhoto({
quality: 90,
allowEditing: false,
resultType: CameraResultType.Uri
});
  // The webPath property is the URL we can use in an <img> tag
  if (image.webPath) {
    setImageUrl(image.webPath);
  }
} catch (error) {
  console.error("Error taking picture", error);
}
};
return (
{imageUrl &&
);
};
export default PhotoTaker;
That's it. This code snippet is all you need to open the native camera UI, let the user snap a picture, and get a temporary URL to display it right in your app.
Handling Permissions and Platform Differences#
Of course, you can't just access a user's camera without asking first. Capacitor handles the permission prompts for you on iOS and Android automatically, which is a huge time-saver. However, you'll still need to declare the required permissions in your native configuration files.
For a deeper dive into this and other native integrations, check out our complete tutorial on implementing native device features, which covers the configuration steps in more detail.
Below is a quick look at some of the most popular Capacitor plugins and what they allow you to do. It gives you a good idea of just how much of the device is at your fingertips.
Popular Capacitor APIs and Their Native Functions#
| Capacitor Plugin | Native Feature Unlocked | A Practical Use Case |
|---|---|---|
| @capacitor/camera | Device Camera & Photo Library | Letting a user upload a profile picture or scan a document. |
| @capacitor/geolocation | GPS & Location Services | Finding nearby restaurants or tracking a delivery driver in real-time. |
| @capacitor/haptics | Taptic Engine / Vibration Motor | Providing subtle feedback when a user completes an action, like a "thump." |
| @capacitor/local-notifications | On-device Scheduled Alerts | Sending a reminder for an upcoming appointment, even if the app is closed. |
| @capacitor/splash-screen | App Launch Screen Control | Hiding the splash screen only after essential data has been loaded. |
| @capacitor/status-bar | iOS/Android Status Bar | Changing the status bar color to match your app's branding for a seamless look. |
This is just a small sample. The plugin ecosystem unlocks a ton of functionality, allowing you to build feature-rich apps that feel completely at home on the user's device.
It's crucial to handle cases where a feature might not be available. For example, if your app is running in a standard web browser, it won't have the same access as it would on a native device. Capacitor provides a
Capacitor.isNativePlatform()method to help you conditionally render UI or provide fallback experiences.
This thoughtful approach ensures your app feels robust and reliable, no matter where it's running. By gracefully managing permissions and platform availability, you create a polished user experience that feels truly professional.
Getting Your App Ready for the App Store#

Alright, you've built it, you've tested it, and the app feels solid. Now for the final mile: getting your creation ready for the world. This pre-launch phase is less about coding and more about a practical checklist of final touches that turn a development project into a polished, store-ready product.
First up, you need a production-ready build of your Next.js app. This process is crucial—it compiles and optimizes all your JavaScript, CSS, and static assets for the best possible performance out in the wild.
Just pop open your terminal and run this:
npm run build
This command triggers next build, which neatly packages your static output into the out directory. That’s the exact folder Capacitor is looking for. Once that's finished, you have to get these fresh assets synced up with your native projects.
This next command is the one you'll be running a lot. It copies all the web assets into your iOS and Android projects and makes sure any native dependencies are up to date.
npx cap sync
With your web code now sitting nicely inside the native shells, you can open up the native projects themselves to handle the last few platform-specific details.
Polishing Your App's Identity#
Before you can submit a single thing, your app needs a face. I’m talking about professional-looking app icons and splash screens that look crisp and clean across a huge range of device sizes and resolutions.
- App Icons: This is your app's billboard on a user's home screen. You’ll need to generate a whole bunch of different sizes to satisfy both iOS and Android requirements.
- Splash Screens: This is the very first thing a user sees. A sharp, well-designed splash screen creates a seamless transition while your app loads in the background, making everything feel faster.
Thankfully, Capacitor has some great tools to help automate the generation and placement of these assets. This can save you a ton of tedious manual work resizing and dragging files in Xcode and Android Studio.
Managing your versioning is another one of those small but critical details. Both stores use a version number (like 1.0.1) and a build number (like 2). You have to increment these correctly every time you push an update; it’s a strict requirement for both the Apple App Store and Google Play.
Navigating the submission process itself can be its own beast, as both stores have incredibly detailed guidelines. It's easy to miss a small detail that leads to rejection and delays. Make sure to read the official documentation, and it’s also a good idea to check out our summary of common pitfalls and best practices for the App Store review guidelines.
This final stage is where your project officially graduates into a commercial product, ready to compete in a massive market. And it's a good market to be in—global consumer spending on mobile apps hit an incredible $171 billion in 2024. This kind of growth just shows the massive opportunity waiting for a well-built mobile app js project to succeed. You can read more about these amazing mobile app statistics on NimbleAppGenie.
Common Questions About Next.js and Capacitor#
Jumping into a new tech stack always kicks up a few questions. Let's get into some of the most common ones that pop up when you're putting together a mobile app with the powerful combo of Next.js and Capacitor.
How Does Performance Compare to a Fully Native App#
For most apps, the performance is so close to a fully native build that your users will never know the difference. Modern mobile devices have incredibly powerful, optimized web views, which means your UI interactions, animations, and general responsiveness feel snappy and fluid.
Sure, if you’re building a graphically intense 3D game, you might still want a pure native approach. But for the vast majority of apps out there—e-commerce, social media, productivity tools, and business applications—the experience is seamless.
A huge performance win here is that Capacitor calls native device APIs directly. When your mobile app js project needs the camera or GPS, it’s not slogging through a slow abstraction layer. It's making a direct, efficient call right to the hardware.
Can I Use All Next.js Features with Capacitor#
You can use almost everything, but there's one golden rule you have to follow: your Next.js app must be statically exported using output: 'export'. This is non-negotiable because the app runs entirely on the user's device, not on a server.
This means any server-dependent features are off the table inside the mobile wrapper:
- Server-Side Rendering (SSR): Every page has to be pre-rendered as static HTML.
- API Routes: The Node.js runtime that powers these routes simply doesn't exist on a mobile device.
But here’s the good news: all of Next.js's incredible client-side features work perfectly. You get to use your React components, hooks, slick data fetching libraries like SWR or React Query, and the entire ecosystem of npm packages you already know and love.
What Are the Main Alternatives to This Approach#
If you're set on using JavaScript for mobile development, you've got a few solid options. The classic alternative for wrapping an existing web app is Apache Cordova, though Capacitor is now widely seen as its more modern, developer-friendly successor.
If you're starting a mobile app from scratch, the biggest name in the game is React Native. The core difference is fundamental: React Native requires you to write platform-specific UI components using its own component library. In contrast, the Next.js and Capacitor method lets you reuse your existing web codebase directly—a massive advantage for keeping your code consistent and moving quickly.
Ready to build your own mobile app without the headache? NextNative provides production-ready boilerplates and all the tools you need to launch on iOS and Android using the Next.js and Capacitor stack you just learned about. Skip weeks of setup and start building your dream app today at https://nextnative.dev.