How to Build Capacitor Apps A Practical Guide
Updated: July 21, 2025
So, you're a web developer who wants to build a real, native iOS and Android app without getting tangled up in Swift or Kotlin? You're in the right place. Building an app with Capacitor means you get to wrap your existing web project in a native shell. It’s the perfect bridge between the web skills you already have and the mobile platforms you want to reach.
Why Should You Build Your Next App with Capacitor?#

Capacitor's magic lies in letting you use what you know—HTML, CSS, and JavaScript—to build high-quality mobile apps. Instead of starting from scratch for iOS and Android, you get to build directly on top of your web projects. This approach doesn't just cut down development time; it keeps your codebase lean and unified.
Think of Capacitor as a supercharged container for your web app. It gives your web code a powerful bridge to native device features like the camera, GPS, and push notifications, things that are typically a headache (or impossible) for a standard mobile website.
Use the Web Dev Skills You Already Have#
The biggest win here is obvious: you don't need to be a native developer. If you're comfortable with a modern framework like React, Vue, or Angular, you already have the skills you need. This guide will walk you through using Next.js, specifically with our NextNative setup, to blend a top-tier React framework with Capacitor’s mobile prowess for fantastic performance.
This isn't just about building faster. It makes long-term maintenance a breeze. You'll manage one codebase for your website and mobile apps, allowing you to push updates everywhere at once.
Tap into a Rich Native Ecosystem#
Capacitor does more than just show your web app in a box; it deeply integrates it. With a massive library of plugins, you can tap directly into the device's hardware and operating system.
Here are a few things you can do right out of the box:
- Camera and Filesystem: Access the device camera to snap photos or let users pick files from their storage.
- Geolocation: Get precise user location data for maps or location-based features.
- Haptics: Add physical feedback with vibrations to make the user experience feel more real.
- Push Notifications: Keep users engaged with timely alerts right on their home screens.
The tech behind building apps is always evolving, and it often mirrors the demand for more advanced electronic components. In fact, industry reports predict that global demand for the physical capacitors used in electronics will grow by about 6% annually over the next decade.
Building with a familiar web stack also opens up your talent pool. If you're looking to grow your team, you're not just limited to native mobile specialists. For great tips on this, check out this guide on hiring remote software developers.
Learning to build with Capacitor gives you a flexible, forward-thinking approach to app development. To get a feel for what’s possible, you should also read our guide on https://nextnative.dev/blog/how-to-build-cross-platform-mobile-apps for a broader look.
Capacitor vs Other Hybrid App Solutions#
To put things in perspective, it helps to see how Capacitor stacks up against other popular hybrid frameworks. Each has its own philosophy and trade-offs.
| Feature | Capacitor | React Native | NativeScript |
|---|---|---|---|
| Core Technology | Web View (HTML, CSS, JS) | Native UI Components (JS bridges to native code) | Native UI Components (JS, XML, CSS) |
| Primary Skillset | Web Development (React, Vue, etc.) | React & JavaScript | JavaScript/TypeScript (Angular, Vue, Svelte) |
| UI Rendering | Renders standard web content inside a native WebView. | Translates JavaScript components into native platform-specific UI widgets. | Renders native UI elements directly, no WebView involved. |
| Plugin Ecosystem | Extensive and growing, with strong community and official plugins. | Very large and mature ecosystem. | Good ecosystem, with direct access to native APIs. |
| Best for... | Web developers wanting to reuse existing web apps and skills for mobile. | Teams invested in the React ecosystem aiming for a "native feel." | Developers needing direct, low-level access to native platform APIs. |
Ultimately, Capacitor shines for web developers who want to move fast and reuse what they've already built. It offers a practical path to mobile without ditching the web stack you love.
Get Your Development Environment Ready#
Alright, before we dive into the fun part—actually building your app—we need to get your machine set up. Think of this as prepping your workshop. Getting your environment configured correctly from the start saves you from a world of headaches later on. A little bit of setup now means you can focus on building something awesome.
The absolute first thing you'll need is Node.js. It's the engine for pretty much all modern web development, and it comes with npm (Node Package Manager), which is how you'll manage Capacitor, its plugins, and everything else your project depends on.
Core Dependencies for All Platforms#
First up, head over to the official Node.js website and grab the latest LTS (Long-Term Support) version.
Once it's installed, pop open your terminal or command prompt and run these two quick commands:
node -vnpm -v
If you see version numbers pop up for both, you’re golden. With Node.js and npm in place, you have the foundational tools for any Capacitor project, whether you're aiming for iOS, Android, or just the web.
I highly recommend bookmarking the official Capacitor site. Their documentation is fantastic, and you'll find yourself referencing it for plugins and core concepts as you build.
Now, let's tackle the tools you'll need to actually run your app on a phone.
Native Toolchains for iOS and Android#
This is where your setup splits depending on your target platform.
For iOS, you have to be on a Mac and you'll need Xcode. You can download it for free directly from the Mac App Store. After it’s installed, a pro-tip is to also install the Xcode Command Line Tools, since Capacitor uses them behind the scenes.
For Android, you'll need to install Android Studio, which works on Windows, macOS, and Linux. Once that's set up, you'll use its built-in SDK Manager to install the Android SDK Platform for the version you want to target. A crucial step here is creating an Android Virtual Device (AVD) so you can run your app in an emulator without having to plug in a physical device every time.
Getting the native toolchains set up is often a major decision point for developers. It’s one of the biggest differences in workflow between various frameworks. If you're still exploring your options, our in-depth comparison of Capacitor vs React Native breaks down how each one handles the native side of things.
Taking the time to get these fundamentals right is a non-negotiable step. It ensures that when you eventually run npx cap sync—the command that bridges your web code with the native iOS and Android projects—everything just works smoothly.
Getting Your First Project Off the Ground with Next.js and Capacitor#

Alright, with your development environment all set up, it's time for the fun part: actually building something. This is where your idea starts to feel real. We're going to skip the basic "hello world" and jump right into structuring a proper project using Next.js—a fantastic framework for React—and then wrap it all up with Capacitor to make it a mobile app.
Our goal here is to build a solid foundation that you can easily manage and expand upon. We'll be using the NextNative approach, which really helps streamline the initial setup. First things first, let's get a new Next.js application scaffolded.
Kicking Off Your Next.js App#
Pop open your terminal and head over to the folder where you like to keep your projects. The first real step is to use the standard create-next-app command. It’s a handy tool that sets up a complete, working Next.js project so you don't have to deal with all the boilerplate yourself.
Go ahead and run this command:
npx create-next-app@latest your-app-name
The setup wizard will ask you a few quick questions. For this guide, just go with the defaults. It’ll suggest using TypeScript, ESLint, and Tailwind CSS, which is a fantastic stack for building a serious application. Once that’s done, jump into your new project directory (cd your-app-name), and you’ll have a fully functioning Next.js web app.
A Quick Pro-Tip: Don't skimp on your web foundation. Since Capacitor is essentially wrapping your web project, the quality of your web code directly translates to the quality and performance of your mobile app. A solid start here pays off big time later.
Bringing Capacitor into the Mix#
Now that you have a Next.js app, let's introduce Capacitor. While still inside your project's main directory, you'll need to run a couple of commands to get Capacitor initialized. This will add the necessary dependencies and configuration files right into your existing project.
Run these two commands in your terminal, one after the other:
npm install @capacitor/core @capacitor/clinpx cap init
The init command will ask for two things: your app name and an app ID. That app ID needs to be in a reverse domain format, like com.yourcompany.appname. This is super important because it's the unique identifier you'll need for the Apple App Store and Google Play Store.
If you’re thinking about turning an existing website into an app, you might find some extra useful info in our guide on using a web to app converter.
Pointing Capacitor to Your Web Files#
After initialization, Capacitor adds a really important file to your project: capacitor.config.ts. This file is the bridge—it tells Capacitor where to find your compiled web code. By default, a Next.js build goes into a .next/ folder, but for a mobile app, we need something a little different: a static export.
To get this static version, you need to make a small tweak to your next.config.js file. Just add one line to enable static exports:
/** @type {import('next').NextConfig} */ const nextConfig = { output: 'export', }
module.exports = nextConfig
Perfect. Now, when you run npm run build, Next.js will generate a static version of your site and put it in a new folder called out. This is exactly what Capacitor needs!
The last step is to update your capacitor.config.ts to point to this out directory.
Your config file should end up looking something like this:
import { CapacitorConfig } from '@capacitor/core';
const config: CapacitorConfig = { appId: 'com.yourcompany.yourapp', appName: 'Your App Name', webDir: 'out', // Point this to the Next.js static export folder server: { androidScheme: 'https' } };
export default config;
With that final configuration in place, you've successfully connected your Next.js project to Capacitor. You're now ready to add native iOS and Android platforms to your project and start building out your app's features.
Integrate Native Features with Capacitor APIs#
You've got your Next.js app running inside a native mobile shell. That's a massive win, but let's be honest, the real magic happens when your app stops feeling like a website and starts behaving like a real native application. This is where Capacitor's incredible ecosystem of plugins comes into play, acting as the perfect bridge between your web code and the phone's hardware.
Think about it. A web app is great for displaying content, but modern mobile apps do so much more. What if a user wants to upload a new profile picture? You'll need access to the camera. Offering local delivery? You’ll need the user's location. Capacitor makes this surprisingly simple by exposing native device functions through easy-to-use JavaScript APIs.
This is the step that truly elevates your app from a passive web view to an interactive, context-aware tool. Honestly, learning how to build Capacitor-powered apps that feel truly native is all about mastering these API integrations.
Accessing Device Hardware with Capacitor Plugins#
Let's walk through a few essential plugins to see how this works in the real world. I’ll show you how to tackle three of the most common features you'll probably want to add: the camera, device location, and haptic feedback.
The process for adding each one is refreshingly consistent. You'll typically:
- Install the plugin package using npm.
- Import the specific API from the plugin right into your React component.
- Call the API methods to make the native magic happen.
If you're new to connecting different systems like this, checking out a solid ultimate API integration tutorial can give you a great foundation that applies to more than just Capacitor.
Now, let's say you're building a social media app. A user taps a button to add a new photo. Behind the scenes, your React component would call the Capacitor Camera API. It looks something like this:
// Example of using the Camera API in a React component import { Camera, CameraResultType } from '@capacitor/camera';
const takePicture = async () => { const image = await Camera.getPhoto({ quality: 90, allowEditing: true, resultType: CameraResultType.Uri });
// image.webPath will contain a URL that can be used as the src for an tag
const imageUrl = image.webPath;
// Now you can use this imageUrl to display the photo in your app
};
This one small function opens the native camera on iOS or Android, lets the user snap a picture, and then sends the image path right back to your web code. It's that straightforward. No wrestling with complex native code required.
This diagram helps visualize the basic mechanical steps of assembling a physical capacitor, which isn’t what we’re doing, but it’s an interesting look at the hardware equivalent!
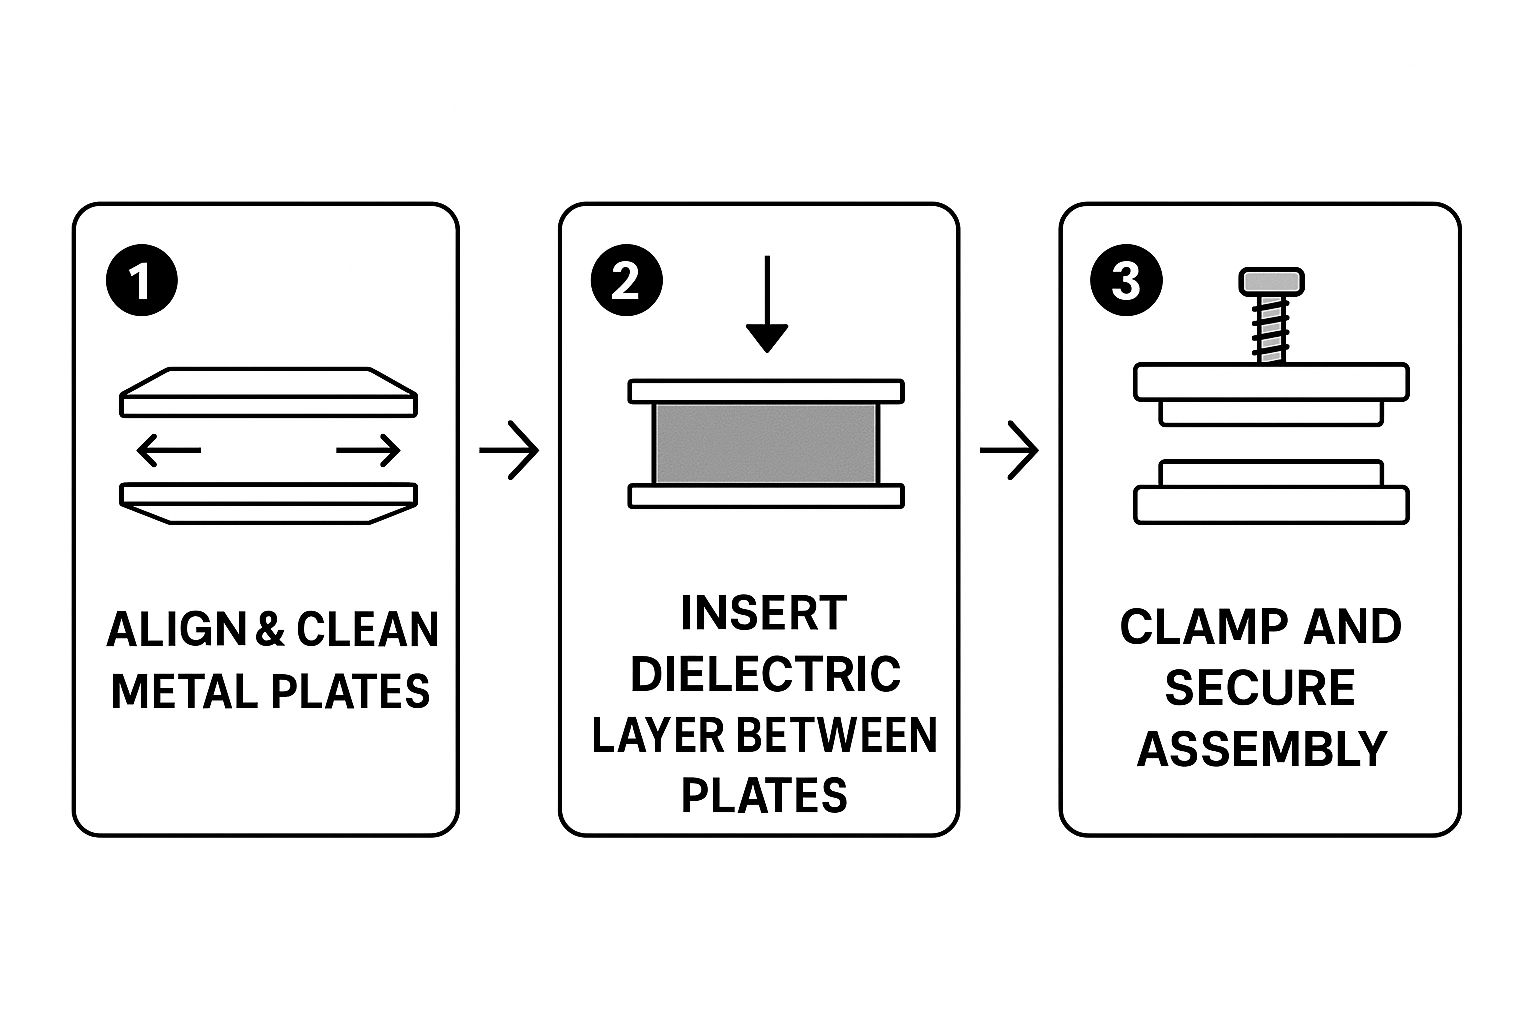
The infographic shows the core process: aligning plates, adding the dielectric material, and securing it all together—the fundamentals of how the physical component is built.
Adding More Native Polish#
Beyond the camera, other plugins add those layers of polish that users just expect from a high-quality app. The Geolocation API can fetch the user's current coordinates for mapping or location-aware features. The Haptics API is another favorite of mine; it can trigger subtle vibrations for feedback on things like button presses or successful form submissions.
Tapping into these native features is what separates a good hybrid app from a great one. Performance is key here; a responsive camera or fast location lookup makes the entire experience feel snappy and integrated.
These small touches make a world of difference in the user experience, making your app feel right at home on the device. As you begin weaving in more of these features, you might also want to explore ways to improve mobile app performance to keep everything running buttery smooth. Integrating these APIs isn't just a "nice-to-have"—it's the final, crucial step in learning how to build a Capacitor app that truly rivals its native-built counterparts.
Alright, let's get this app off your computer and onto a real phone. This is the moment of truth—that magical step where your web code finally feels like a real, tangible mobile app in your hand. It's an awesome feeling, and it's simpler than you might think.
First things first, after you’ve made some changes to your web code (your Next.js pages, components, etc.), you need to sync them with the native projects. Capacitor has a handy command for this.
npx cap sync
Think of this command as the bridge between your web world and the native world. It grabs your latest compiled web assets—everything in that out folder—and copies them over to the iOS and Android projects. It also checks for any new Capacitor plugins you might have installed and makes sure the native side knows about them.
Crack Open the Native IDEs#
With your projects all synced up, it’s time to open them in their native development environments. This is one of my favorite things about Capacitor; it doesn't try to hide the native layer from you. Instead, you get full access to Xcode and Android Studio.
- For iOS: Pop open your terminal and run
npx cap open ios. - For Android: Similarly, run
npx cap open android.
These commands will fire up the correct IDE—either Xcode or Android Studio—and load your project automatically. Having this direct line to the native tools is a huge advantage when you need to tweak something specific or troubleshoot.
Running on a Real iOS Device#
Got Xcode open? Great. Now, plug your iPhone into your Mac using a USB cable. You should see your phone's name appear in the list of build targets near the top of the Xcode window.
Before you get too excited and smash that "Run" button (the little play icon), there's one crucial step: code signing. This is Apple’s security requirement to ensure apps come from a known developer. Head over to the "Signing & Capabilities" tab for your project. You'll need to select a development team associated with your Apple ID.
If you hit any weird errors during the build, nine times out of ten, it’s a signing issue. Once that's sorted, click "Run" and watch the magic happen as Xcode builds, signs, and installs the app right onto your phone.
Launching on an Android Device#
The process for Android is just as straightforward. On your Android phone, you'll first need to enable "Developer Options" and then switch on "USB Debugging" from within that menu. It sounds technical, but it’s just a few taps in your phone’s settings.
Now, connect the phone to your computer with a USB cable. Over in Android Studio, your device should show up in the dropdown menu at the top. If it doesn't, you might need to check that your computer has the right USB drivers installed.
Once you see your device, select it and click the green "Run 'app'" play button. Android Studio will kick off a Gradle build, which can take a minute, and then push the app directly to your device.
A Pro Tip: Doing this manually is fine for testing, but for any real project, you'll want to automate it. Getting comfortable with modern CI/CD pipelines is a game-changer. It lets you automatically build and deploy your app every time you push new code, saving you a massive amount of time and effort.
Seeing your app launch for the first time on a physical device is a huge milestone. It’s the successful leap from abstract code on a screen to a real-world mobile experience you can actually hold and use. Enjoy the moment
Common Questions About Building with Capacitor#

Whenever you dive into a new technology like Capacitor, a few questions are bound to come up. It's a fantastic tool, but figuring out exactly how it fits into the broader mobile development ecosystem is crucial. I've been there myself!
Let's tackle some of the most common questions I hear from developers who are just getting their feet wet.
Can I Use Any Web Framework with Capacitor?#
You sure can, and that's one of its biggest selling points! Capacitor is framework-agnostic by design.
Whether your team lives and breathes React, Angular, Vue, or even good old-fashioned HTML and JavaScript, Capacitor can wrap it up for mobile. This guide has focused on Next.js paired with our NextNative toolkit because it gives you a solid, production-ready foundation, but the core concepts are universal.
What's the Real Difference Between Capacitor and Cordova?#
Think of Capacitor as the spiritual successor to Apache Cordova, built by the brilliant minds behind the Ionic Framework. While they share the same goal—running a web app inside a native shell—their approach is fundamentally different.
Capacitor puts you in the driver's seat by treating the native iOS and Android projects as source artifacts. You commit them right into your repo. This gives you way more control and direct access to native tools like Xcode and Android Studio when you need them. Cordova, on the other hand, tends to abstract that layer away, which can make deep native customizations feel a bit clunky.
How Do I Handle App Updates?#
This is where Capacitor's magic really shines, especially for teams that move fast. For most of your web-based changes—updating UI components, tweaking styles, or fixing a logic bug in your JavaScript—you can push updates instantly without going through the whole app store review process. Tools like Ionic Appflow's Live Updates make this possible, and it’s a game-changer.
Of course, some changes will always require a full, fresh submission to the Apple App Store and Google Play Store. You'll need to do this when you're:
- Changing Native Code: Directly modifying the Swift/Objective-C or Java/Kotlin code.
- Adding New Native Plugins: Integrating a new plugin that adds native capabilities.
- Updating Core Configs: Messing with app icons, splash screens, or permissions in
capacitor.config.ts.
Thinking ahead about your update strategy is a key part of the job. To get a better handle on the entire process, I highly recommend checking out these mobile development best practices. Getting this right from the start will save you a ton of headaches down the road.
Ready to build your Next.js-powered mobile app without the headache? With NextNative, you get a production-ready boilerplate with native-like page transitions, authentication, database integration, and more, all out of the box. Skip the tedious setup and start building your dream app today. Check out NextNative to get started.