A Friendly Guide to Install a Capacitor
written by Denis Tarasenko | July 23, 2025

So, you're ready to install a capacitor. You've probably heard it involves discharging it, disconnecting the power, and hooking up the terminals. That's the gist, but doing it right is what separates a smooth-running system—whether in your car's audio setup or an HVAC unit—from one that's prone to damage. Let's get it done properly.
Understanding Your Capacitor Installation#
Welcome! If you're looking to install a capacitor, you've come to the right place. Maybe you're a car audio fanatic who's sick of your headlights dimming every time the bass hits, or perhaps you're an electronics tinkerer diving into a new project. Whatever your reason, I'm here to give you straightforward, practical advice without the heavy-duty jargon.
Think of a capacitor as a tiny, incredibly fast battery. Its job is to store and release energy on demand, which is perfect for stabilizing voltage in power-hungry systems. In a high-end car stereo, for instance, a capacitor delivers that quick jolt of power your amplifier craves for deep bass, saving your car's electrical system from the strain.
Core Principles Before You Begin#
Before you even think about picking up a tool, let's cover a few non-negotiables. Safety is everything. Capacitors can hold a lethal charge long after they've been disconnected from a power source. The golden rule is to always treat a capacitor as if it's live until you've personally and safely discharged it.
One of the most common slip-ups I see is people connecting a brand-new capacitor directly to the battery. This creates a massive power surge that can easily blow fuses or, worse, fry your amplifier. You must charge it slowly first, typically with a resistor or a simple test light.
These little components are everywhere, from the phone in your pocket to massive industrial machines. Their widespread use is a major reason the global capacitor market was recently valued at around $340.8 billion. That number gives you an idea of just how essential these parts are in modern electronics. If you're curious, you can learn more about these global electronics trends and how they might affect component availability.
By the way, if you're a developer weighing your options for a mobile project, our detailed comparison of Capacitor vs React Native is a great resource to help you make an informed choice.
Getting this right comes down to good prep. Having the right tools on hand and understanding what you're working with will make the difference between a successful installation and a day full of headaches. Next, let's talk about the specific gear you'll need.
Essential Tools and Safety Gear Checklist#
Before starting, it's a great idea to lay out all your tools and safety equipment. This quick checklist ensures you have everything you need for a smooth and, more importantly, safe installation.
| Item | Purpose | Why It's Important |
|---|---|---|
| Safety Glasses | Eye Protection | Protects your eyes from sparks or flying debris. Non-negotiable. |
| Insulated Gloves | Electrical Safety | Prevents accidental shocks from a charged capacitor or live wires. |
| Multimeter | Voltage Testing | The only way to be 100% sure a capacitor is fully discharged. |
| Resistor or Test Light | Charging/Discharging | Allows for the safe, slow charging and discharging of the capacitor. |
| Wrench/Socket Set | Mounting & Connections | For tightening terminal nuts and mounting brackets securely. |
| Wire Strippers/Cutters | Cable Preparation | To cut and strip power and ground cables to the correct length. |
| Screwdriver Set | Mounting Hardware | Needed for securing the capacitor's mounting bracket to the vehicle. |
Having these items ready to go will not only speed up the process but also reinforces the safe practices needed when working with powerful electrical components.
Picking the Perfect Capacitor for Your Project#

Before you can even think about installation, you’ve got to make sure you have the right capacitor for the job. Trust me, not all capacitors are the same, and your project's success really depends on picking a component that can handle what you're throwing at it. It might seem like a lot to take in at first, but once you know the key specs, it's pretty straightforward.
For example, if you're building a beefy car audio system, a large electrolytic capacitor is your best friend. It’s designed to store and dump massive amounts of energy on demand. But for something more delicate, like filtering a sensitive audio signal, a smaller film capacitor offers the precision you need.
It’s no surprise the demand for these components is exploding, especially with their use in everything from EVs to our everyday gadgets. The global capacitor market, valued at $38.91 billion, is projected to soar to $69.42 billion by 2034. If you're curious, you can explore more data on these market trends and see how the industry is evolving.
Making Sense of Capacitor Specs#
When you pick up a capacitor, you’ll see a bunch of numbers printed on its side. These aren't just for show—they're the key to understanding what it can do.
Here’s what to look for:
Capacitance (Farads - F): This is the main spec. It tells you how much of an electrical charge the capacitor can hold. For car audio, a good rule of thumb is to aim for 1 Farad of capacitance for every 1,000 watts of amplifier power.
Voltage Rating (V): This is the maximum voltage the capacitor can safely handle without blowing up. You always want a voltage rating that’s comfortably higher than your system's operating voltage. Since a typical car runs on 12-14V, a capacitor rated for 16V or 20V gives you a safe buffer.
ESR (Equivalent Series Resistance): This one is super important but often overlooked. A lower ESR is always better. It means the capacitor can release its stored energy faster and more efficiently, which is critical in high-power situations.
A classic rookie mistake is getting fixated only on Farads. A high-Farad capacitor with a lousy ESR won't be quick enough to prevent things like your headlights dimming when the bass hits. For peak performance, you need to find that sweet spot between high capacitance and a low ESR.
Prepping for a Safe and Successful Installation#

Before you even think about grabbing your wiring kit, let's talk about the most crucial part of this entire process: preparation and safety. Getting this right from the start is what separates a quick, successful install from a long, frustrating afternoon chasing down problems.
The image above gives you a glimpse into the world of capacitors. You'll see different types, from bulky electrolytic cans to tiny ceramic discs. While they look different, they all do one thing really well: store a serious electrical charge. And that's exactly why we need to be careful.
Even a capacitor fresh out of the box can hold a charge from factory testing. Trying to install a capacitor without discharging it is a recipe for disaster. You're risking a nasty electrical shock or, at the very least, damaging the very components you're trying to improve. Safety first, always.
How to Safely Discharge Your Capacitor#
Discharging a capacitor sounds technical, but it’s actually pretty straightforward. All you're doing is giving that stored energy a safe, controlled path to escape. I find the easiest way is to use a resistor or even a simple 12V test light.
Just connect the resistor or light across the capacitor’s positive and negative terminals. Hold it there for about 30 seconds, and you're good to go. If you have a multimeter, you can literally watch the voltage drop down to zero for extra peace of mind.
Pro Tip: Whatever you do, never use a screwdriver, wrench, or any other piece of metal to short the terminals together. You'll get a loud pop, a bright spark, and you could easily weld the tool right to the terminals, ruining the capacitor before you even get started.
Finding the Perfect Mounting Spot#
Once your capacitor is safely discharged, it's time to find it a permanent home. Where you decide to mount it makes a huge difference in how well it performs.
Here's what I always look for when picking a location:
- Keep it Close: If you're installing this for a car audio system, the capacitor needs to be as close to your amplifier as possible. Aim for less than 18 inches of cable between them. Any further and you start losing the benefit of that instant power.
- Keep it Stable: Find a solid surface and mount the capacitor securely. Constant, heavy vibration is the enemy of electrical connections and can cause things to loosen up over time.
- Keep it Cool: Heat kills electronics. Make sure you mount the capacitor far away from your engine, exhaust system, or any other major heat source. High temps will shorten its lifespan, guaranteed.
Taking a few minutes to get these details right is the most important part of the job. It’s what ensures your system runs safely, effectively, and for a long, long time.
Alright, you've safely discharged your capacitor and found the perfect spot for it. Now for the fun part: getting it mounted and wired into your system.
A solid mount isn't just about looking clean; it's absolutely critical. I've seen countless setups fail because vibrations worked the connections loose over time. It’s a simple thing to prevent.
Your capacitor kit should include mounting brackets and screws. Use them to get that cap screwed down tight to the spot you prepped earlier. Give it a good shake—it shouldn't move at all. Trust me, tracking down an intermittent power issue from a wobbly capacitor is a nightmare you want to avoid.
The image below gives you a great visual checklist for the key safety steps involved in the connection process.
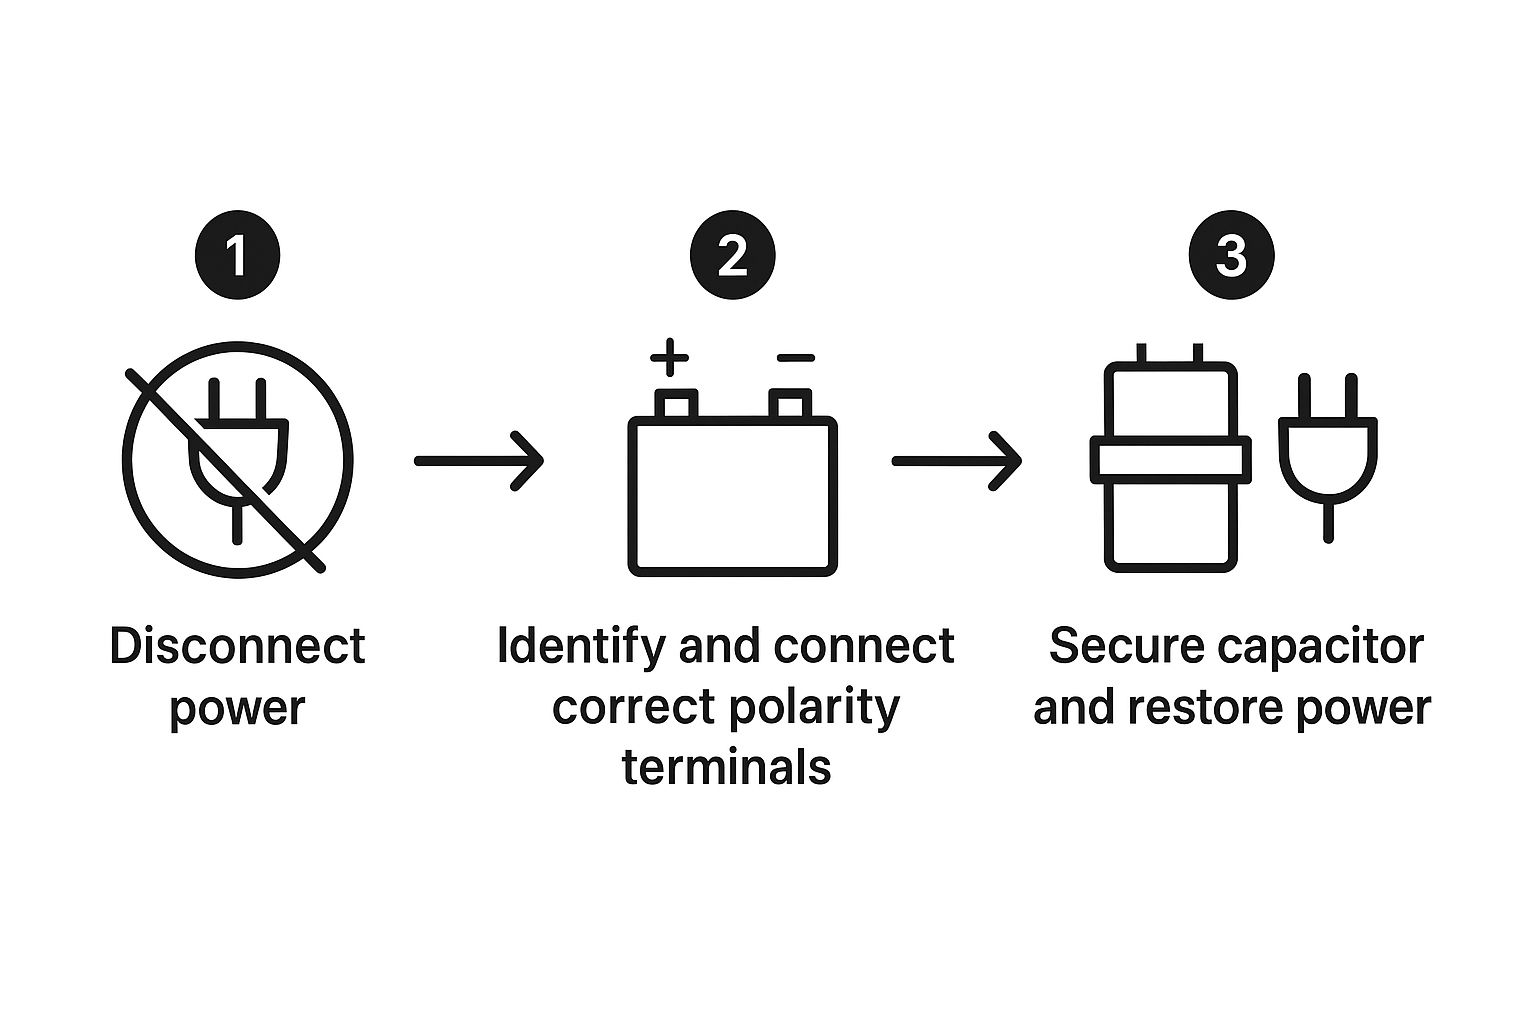
Think of it this way: disconnect power, double-check your polarity, and secure everything before you even think about turning the power back on. These are the three pillars of any electrical install, whether it's in a car or a house.
Getting the Wiring Right#
With the capacitor securely in place, it’s time to run the wires. You’ll be working with the main power, ground, and remote turn-on cables. For clean, reliable connections, I always use ring terminals. They give you a much better and more secure fit on the capacitor’s posts than just wrapping bare wire.
Here’s the most effective way to wire everything up:
The Positive (+) Path: Start by running a power cable from your battery's positive terminal (don't forget the fuse holder near the battery!) to the capacitor's positive (+) terminal. Then, use a second, shorter power cable to connect the capacitor's positive (+) terminal to your amplifier's positive (+) terminal. It is absolutely crucial to keep this second cable under 18 inches long for the capacitor to work effectively.
The Negative (-) Path: Find a good, solid ground on your vehicle's chassis. You'll need to sand or scrape off any paint to get down to the bare metal. Run a ground cable from that spot to the capacitor's negative (-) terminal. Finally, connect your amplifier's ground terminal to the capacitor's negative (-) terminal with another short cable.
The Remote Turn-On: This is the small wire that acts as a signal, telling your capacitor and amp to power up with the head unit. Just run the remote wire from your stereo to the capacitor's remote terminal, then jump another small wire from there over to the amplifier's remote terminal.
Pro Tip: Never, ever run your main ground wire all the way back to the battery's negative post. A proper chassis ground is shorter, provides a better connection, and is much safer for your car's electrical system. A bad ground is the #1 culprit behind engine whine and poor amplifier performance.
While this guide is all about the hardware, this kind of step-by-step logic is universal. If you're a developer working on mobile apps, you might appreciate our guide on how to build a mobile app with Capacitor, which follows a very similar structured approach.
Powering Up and Testing Your New Capacitor#
Alright, you've done the heavy lifting. Your capacitor is mounted, and the wires are all run. Before you crank up the volume and celebrate, we have one last, absolutely crucial step: charging the capacitor before making the final connection.
Trust me, you don’t want to skip this. Hooking up an empty capacitor directly to your battery is asking for trouble. It creates a massive, instant current draw that can pop fuses, fry your amplifier's sensitive electronics, or even kill the brand-new cap you just worked so hard to install.
How to Safely Charge the Capacitor#
The trick is to introduce the charge slowly. All you need is a small resistor, which usually comes in the capacitor kit, or even a simple 12V test light. Just wire the resistor or light between the battery's positive terminal and the capacitor's positive post.
If you're using a test light, you'll see it shine brightly and then slowly fade out. Once the light is completely off, it means the capacitor’s voltage has equalized with the battery's. Now it’s perfectly safe to remove the test light and make that final, direct connection.
This quick pre-charge is your best defense against a damaging voltage spike. It’s a sixty-second step that can save you hours of headaches and the cost of replacing fried components down the line.
The Moment of Truth: Did It Work?#
With your capacitor safely charged and fully connected, it's time to see the payoff. Fire up your system and keep an eye (and ear) out for the improvements.
Here's what you should be looking for:
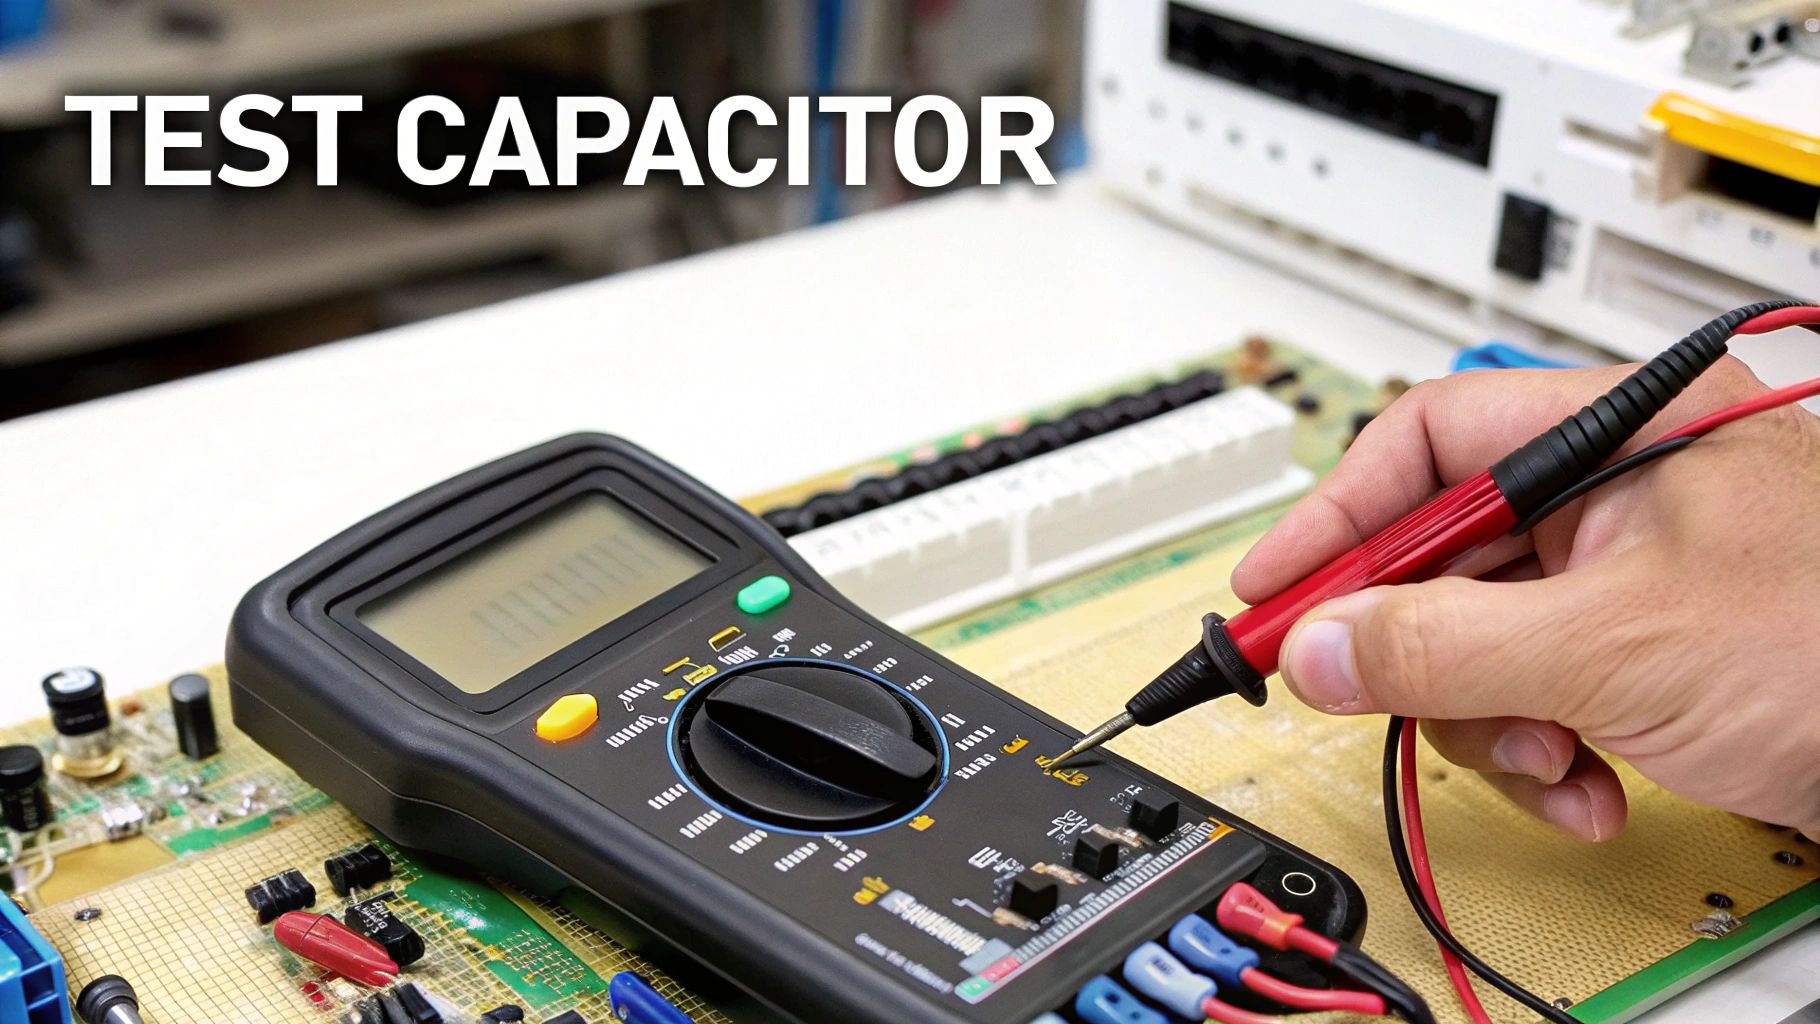
- Steady Voltage: Grab a multimeter and check the voltage at your amplifier's power terminals. It should hold steady, especially when a deep bass note hits.
- No More Light Show: If you were dealing with dimming lights in your car, that problem should be a thing of the past. Your headlights and dash lights should stay bright, no matter how loud the music gets.
- Better Performance: Ultimately, it's all about how it sounds and feels. Your audio should be noticeably cleaner, and the system should feel more powerful and responsive.
This final check confirms you've nailed the installation. And for those of you interested in boosting performance in other areas, you might find our software-focused guide to improve mobile app performance surprisingly relevant.
Common Installation Mistakes to Avoid#
Let's be honest, learning from someone else's mistakes is a whole lot faster—and less frustrating—than making them yourself. When you install a capacitor, a few common slip-ups can cause everything from annoying performance issues to outright equipment damage. Getting these details right from the start will save you a world of trouble down the road.
One of the biggest culprits I see is a bad ground connection. Just screwing the ground wire into a painted metal surface isn't going to cut it. You absolutely have to sand that spot down to the bare metal. A weak ground is the classic cause of that dreaded alternator whine and it seriously hobbles the capacitor's ability to deliver power when it's needed most.
Wire Size and Placement#
Using wiring that's too small is another classic mistake. If your power wire is too thin, it creates a bottleneck for the electrical current. This completely defeats the entire purpose of adding a capacitor, which is meant to give your amplifier a quick jolt of unrestricted power.
Where you put the capacitor is just as important. If you mount it more than 18 inches from the amplifier, you’re adding too much resistance from the wire itself. That slows down the energy transfer. The golden rule? Keep it close!
The most dangerous mistake by far is reversing the polarity. If you hook up the positive and negative terminals backward, you risk the capacitor venting, smoking, or even exploding. Always, always double-check your connections before you power anything on.
Capacitors are a huge deal in modern electronics, with the market valued at around $26 billion. They’re even starting to replace batteries in certain applications because they're so efficient and long-lasting. If you're curious, you can discover more insights about the electric capacitor market and see just how much it's growing.
Thinking ahead to avoid these common errors is a smart habit for more than just hardware. It's a key principle we follow in software development, too. In fact, applying this kind of meticulous logic is a big part of our mobile development best practices. A little extra care upfront ensures a safe and successful outcome every single time.
Got Questions? We've Got Answers#
Even with the best instructions, you're bound to run into a few head-scratchers when installing a capacitor. It happens to everyone. Let's walk through some of the common questions we get all the time.
Can I Just Skip the Resistor and Install the Capacitor?#
I get why you'd ask this—it seems like an extra step. While you technically could hook it up directly, it's a really bad idea.
Think of an empty capacitor like a dry sponge; connecting it straight to your battery is like hitting that sponge with a firehose. You'll get a massive, instantaneous current draw that can easily blow fuses, fry your amp, or even kill the brand-new capacitor you just bought. That little resistor is there for a reason: it lets the capacitor charge up slowly and safely. Always use it!
Why Won't My Capacitor Hold a Charge?#
This is a classic troubleshooting scenario. If you charge your capacitor, disconnect the power, and the voltage immediately plummets, your first instinct might be to blame the capacitor itself. And sometimes, you'd be right—it could be a faulty unit.
But before you go trying to return it, double-check your wiring. 9 times out of 10, the culprit is a bad ground connection. Make sure you have a solid, clean, bare-metal connection to the chassis. A sneaky short in the wiring could also be draining the power, so give everything a once-over.
A quick pro-tip: Don't fall into the "bigger is always better" trap. While a larger capacitor can help, going way overboard for your system is just a waste of money. The sweet spot is sticking to the 1 Farad per 1,000 watts RMS rule. It keeps things balanced and effective.
Getting these fundamentals right is what separates a frustrating install from a successful one. If you're new to this world and want to build a solid foundation, our guide on mobile app development for beginners shares similar principles for learning complex topics one step at a time.


