A Guide to Mobile App Quality Assurance
Updated: July 10, 2025

Think of mobile app quality assurance (QA) as the secret ingredient behind every five-star app on your phone. It’s the meticulous, behind-the-scenes process that ensures an app is fast, reliable, and genuinely enjoyable to use. This isn't just about squashing bugs; it's a complete strategy for building trust and creating an experience that stands out in a very crowded app store.
Why Quality Assurance Is Your App's Best Friend#

We all have that one favorite app that just works. It’s smooth, never crashes, and feels completely natural from the second you tap it open. That seamless experience is no accident. It’s the direct result of a solid mobile app quality assurance process.
When you consider that a staggering 94% of users will uninstall an app within the first 30 days, you realize just how critical that first impression is. QA is the promise you make to your users that your app will be reliable, secure, and a pleasure to use. It’s like an immune system, proactively finding and fixing problems—bugs, performance lags, security holes—before they can ever damage your reputation.
"Every undetected issue in your app is a ticking revenue leak. Whether it’s a payment gateway bug, a notification misfire, or data not syncing across screens, small cracks can cost big money."
Building Trust Through Proactive Testing#
Gone are the days of treating QA as a final checklist before launch. Modern QA is about testing early and often, starting right from the initial design phase. This approach helps catch fundamental design and logic flaws before they're buried deep in the code, where they become much harder and more expensive to fix.
The best QA teams use a smart mix of automated and manual testing to get the best of both worlds: the speed of automation and the critical eye of a human tester. You can learn more about this integrated approach to mobile application quality assurance and how it lays a foundation of trust.
This proactive mindset is everything because frustrated users rarely send a bug report; they just leave. In fact, while a bad experience quickly leads to a one-star review, only about 4% of consumers will complain directly to the company. QA is your way of hearing those silent frustrations and fixing the issues that would otherwise go completely unnoticed.
The Four Pillars of App Quality#
To build a truly effective QA strategy, it helps to break it down into four core areas. These core areas form the foundation of any effective mobile app QA strategy, ensuring a comprehensive approach to quality.
The Four Pillars of App Quality#
These core areas form the foundation of any effective mobile app QA strategy, ensuring a comprehensive approach to quality.
| Pillar | What It Guarantees | Why It's Critical |
|---|---|---|
| Functionality | The app works as intended. | Ensures core features are reliable and meet user expectations, preventing crashes and errors. |
| Performance | The app is fast and responsive. | Protects against slow load times and high battery drain, which are major reasons for uninstalls. |
| Usability | The app is intuitive and easy to use. | Creates a frictionless user journey, encouraging engagement and long-term retention. |
| Security | User data is safe and protected. | Builds essential trust with users, safeguarding against breaches and protecting your brand. |
By focusing on these four pillars, you cover all your bases, from the visible user interface down to the hidden mechanics that keep everything running smoothly.
Ultimately, putting resources into mobile app quality assurance isn't just a cost. It's a direct investment in your users' happiness, your app's retention rates, and the long-term health of your product. It’s how you build an app that people don't just use, but one they truly love and recommend to others.
Exploring the Core Types of Mobile App Testing#
Think of mobile app quality assurance like a pit crew for a race car. You don't just have one person checking everything; you have a team of specialists, each focused on a different, critical system. One checks the tires, another the engine, and a third the electronics. No single check can guarantee a win, but together, they ensure the car is fast, safe, and ready for the track.
That's exactly what a good QA process does for your app. It uses several distinct types of testing to make sure your app isn't just functional, but also intuitive, fast, and secure. Each one answers a different, vital question about whether your app is truly ready for your users.
Let's break down the core methods that turn a good idea into a great app.
Does Your App Actually Work?#
First up is the most fundamental check: Functional Testing. Its job is simple but absolutely critical: does every feature in your app do what it's supposed to do? When a user taps "Add to Cart," does the item actually get added? Does the login form work with the right password and correctly reject the wrong one?
Think of it like checking every light switch and faucet in a brand-new house. You're not worried about the style of the fixtures or how fast the water gets hot just yet. You're just making sure that when you flip a switch, the light comes on.
"A single broken button or a crash during checkout can be all it takes to lose a customer forever. Functional testing is your first and best line of defense against these kinds of deal-breaking bugs."
This process digs into everything from the user interface and APIs to database connections and how the app talks to the server. It’s the solid foundation all other quality checks are built on.
Is Your App a Joy to Use?#
Once you know the lights turn on, you need to ask a more personal question: is the app actually pleasant to use? This is where Usability Testing comes in. It's less about technical function and more about the human experience. Is the app intuitive? Is it easy to find what you're looking for?
An app can be perfectly functional yet incredibly frustrating. Imagine a TV remote with 100 tiny, unlabeled buttons—it works, but who would want to use it? Usability testing makes sure your app is a clear map, not a confusing maze. To pull this off well on both iOS and Android, developers often rely on the best cross-platform app development tools to build a consistent and intuitive user experience from the start.
Common usability checks include:
- Intuitive Navigation: Can users find what they need without getting lost or frustrated?
- Onboarding Simplicity: Is the first-time user experience smooth and welcoming?
- Clarity of Design: Are buttons, icons, and instructions easy to understand at a glance?
This kind of testing is often done with real people who can give you honest, direct feedback on what feels confusing, awkward, or even delightful.
Can Your App Handle the Pressure?#
Next, we put your app through a stress test with Performance Testing. This is all about measuring speed, responsiveness, and stability under different kinds of pressure. A slow, laggy app is a recipe for uninstalls—in fact, nearly 70% of users admit to abandoning an app because it was too slow.
Performance testing is about finding your app's breaking points before your users do. It measures key metrics like:
- Load Time: How quickly does the app launch and how fast do new screens appear?
- Battery Consumption: Is your app a battery hog that will drain a user's phone?
- Memory Usage: Does it eat up too much device memory, causing the phone to slow down?
- Network Performance: How does it behave on a spotty Wi-Fi or slow cellular connection?
Is Your App Secure and Compatible?#
Finally, a couple of crucial tests round out a truly solid mobile app quality assurance strategy: Compatibility and Security Testing.
Compatibility Testing makes sure your app works beautifully across a huge jungle of different devices, screen sizes, and OS versions. An app that looks perfect on the newest iPhone might be a broken mess on a two-year-old Android device. This testing prevents that.
Security Testing is simply non-negotiable. It’s a focused effort to find any vulnerabilities that could expose your users' private data. This means checking for data leaks, insecure storage, and weak points in your login system to protect both your users and your brand's reputation. As technology evolves, so do the challenges. For instance, the rollout of 5G networks means you have to test for performance on both blazing-fast and older, slower networks to ensure a consistent experience. You can read more about these modern testing challenges to see how the landscape is changing.
Choosing Between Manual and Automated Testing#
One of the biggest questions in any solid mobile QA plan is deciding on the right tool for the job. Do you need the clever, investigative mind of a person, or the speed and precision of a machine? This is the heart of the manual vs. automated testing debate, and the answer isn't always black and white.
Think of manual testing as a detective's work. It’s perfect when you need human intuition to explore the nooks and crannies of your app. This is where a real person tries to "break" the app in creative ways, checks if a new feature feels right, or spots quirks that a script would never notice.
Automated testing, on the other hand, is your tireless factory worker. It’s built to run the same exact, predictable tests over and over again without getting bored or making mistakes. It's a lifesaver for things like regression testing, where you have to make sure a new update didn't accidentally break something that was already working perfectly.
When to Use Manual Testing#
Manual testing is your go-to whenever human judgment, creativity, or empathy is required. It truly shines in a few key areas:
- Usability and User Experience (UX) Testing: Can a real person figure out your app's navigation easily? Is the layout intuitive? Only a human can give you honest feedback on the overall feel and flow.
- Exploratory Testing: This is where testers go off-script. They freely explore the app, guided by their curiosity and experience, to hunt down bugs that structured test cases would miss.
- Ad-Hoc Testing: Need to quickly verify a single bug fix or a small new feature? A quick manual check is often the fastest and most efficient way to get it done.
This visual guide helps break down functional testing, a core activity where both manual and automated methods have a big part to play.
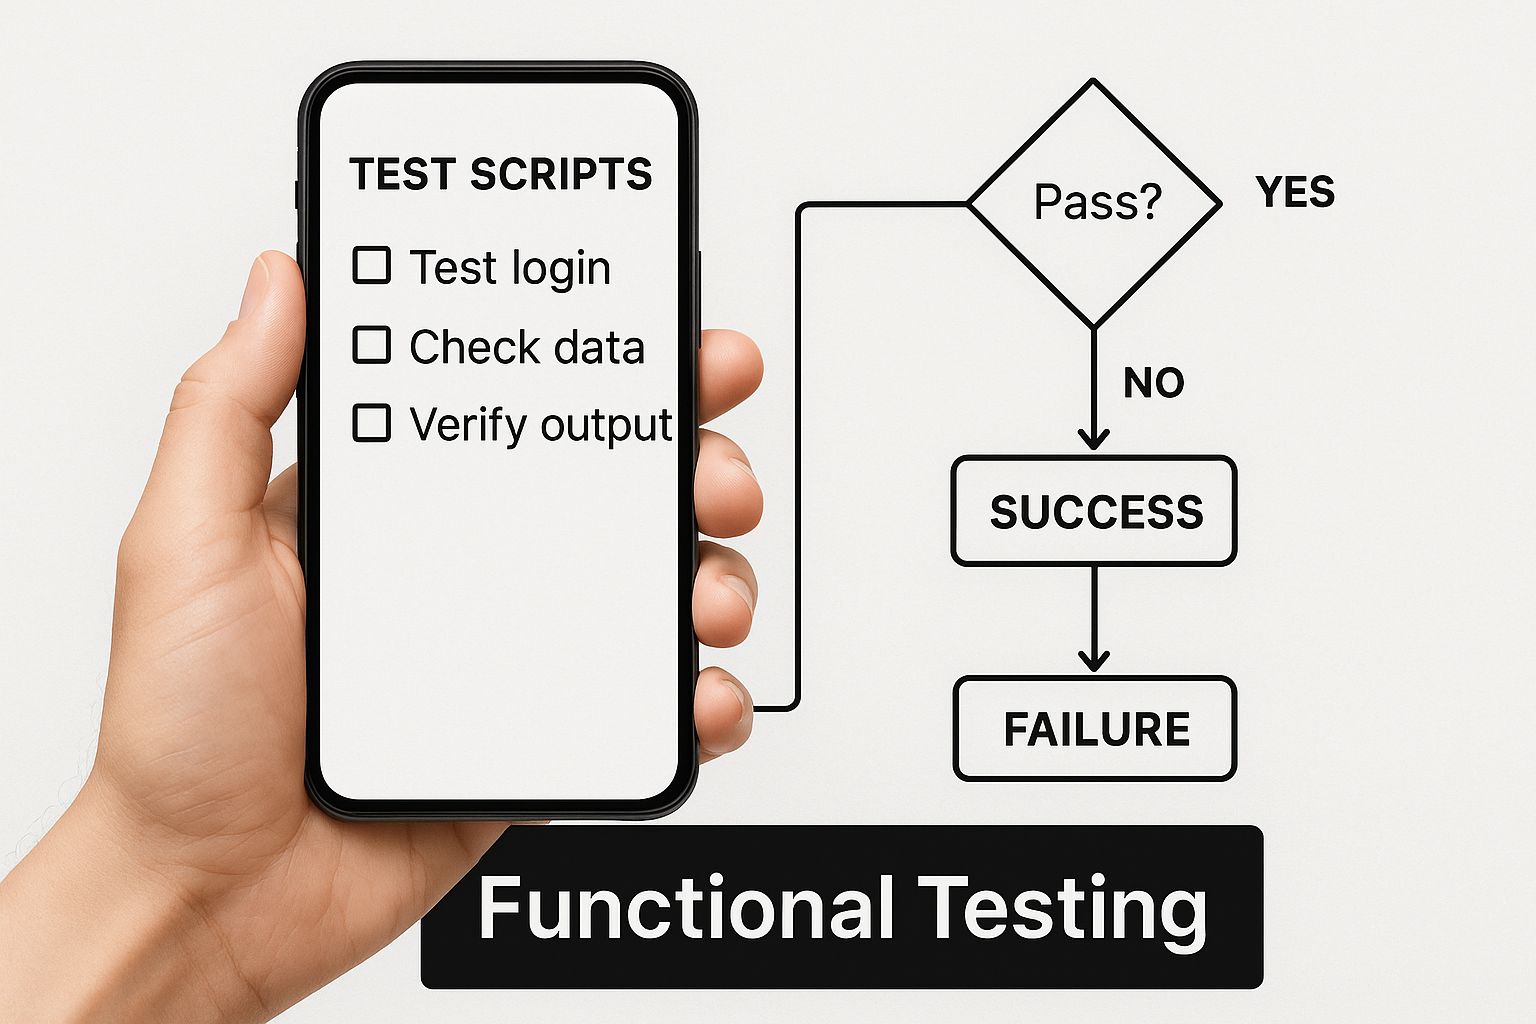
Whether it's a person or a script doing the work, functional tests are all about confirming that the app's core features do exactly what they're supposed to do.
When to Use Automated Testing#
Automation becomes your best friend when you're dealing with tasks that are repetitive, time-consuming, and need to be done perfectly every single time. It's the clear winner for:
- Regression Testing: Automatically running hundreds of tests after every single code change helps you catch new bugs the moment they appear.
- Performance and Load Testing: Want to see how your app holds up when thousands of users log on at once? Automation can simulate this stress test in a way that's impossible to do manually.
- Repetitive Data Entry Tests: Checking if a form works correctly with hundreds of different names, emails, and passwords is the perfect job for a script.
The trend is clear: the industry is leaning heavily into automation. In fact, it's projected that by 2025, automation will cover around 70% of all mobile app testing. This move helps developers get feedback faster and significantly cuts down the time it takes to get an app to market. You can dive deeper into the future of mobile app testing trends to see where things are headed.
To help you decide, here’s a quick-glance table breaking down common scenarios.
When to Use Manual vs Automated Testing#
A practical guide to help you decide which testing approach is the best fit for common quality assurance scenarios.
| Testing Task | Recommended Approach | Why It Works Best |
|---|---|---|
| User Experience (UX) & Usability | Manual | A human is needed to judge subjective elements like "feel," flow, and visual appeal. |
| Exploratory Testing | Manual | Requires creativity, intuition, and the ability to go "off-script" to find unexpected bugs. |
| Regression Testing | Automated | Scripts can run hundreds of repetitive checks quickly and consistently after every code update. |
| Performance & Load Testing | Automated | Simulating thousands of concurrent users is only feasible through automation tools. |
| Ad-Hoc & Quick Checks | Manual | Faster to perform a quick, one-off test by hand than to write, debug, and run a new script. |
| Testing on New Features | Both | Start with manual exploratory tests, then automate the stable, core functions for future regression. |
Ultimately, a smart QA strategy uses the best of both worlds.
The Power of a Blended Approach#
The most successful QA teams don't pick a side. Instead, they build a powerful hybrid strategy that gets the job done right. They automate all the tedious, repetitive checks to keep the app stable and then free up their human testers to do what people do best: explore, think critically, and see the app through a user's eyes.
By combining the speed and scale of automation with the insight and creativity of manual testing, you build a comprehensive QA process that catches more bugs, improves user experience, and delivers a higher-quality app faster.
This blended approach ensures nothing slips through the cracks. The machines handle the heavy lifting, while your human experts find the hidden issues. The result is an app that isn't just technically solid—it's a genuine pleasure to use.
How to Build a Powerful QA Strategy#
Building a solid quality assurance strategy for your mobile app isn't about throwing more money or people at the problem. It’s about being smart, organized, and proactive from day one. A great strategy is your blueprint, guiding the team to build quality into the app from the very first line of code, not just checking for it at the end.
This proactive mindset helps you avoid last-minute chaos and ensures every feature you ship is something your users can rely on. It all begins by asking a simple but crucial question: what does "quality" actually mean for our app? Your answer will shape every decision you make, from the tests you run to the bugs you prioritize.
Define Your Quality Goals and Standards#
Before you can even think about testing for quality, you have to define what it looks like. After all, a "high-quality" experience for a simple note-taking app is worlds apart from what's needed for a complex financial trading platform. This is where you need to set clear, measurable goals.
For instance, your quality standards might look something like this:
- Performance: The app absolutely must launch in under two seconds, even on an iPhone that's three years old.
- Stability: We're aiming for a crash-free session rate of 99.9% or higher. No exceptions.
- Usability: A brand-new user should be able to finish onboarding and perform one key action in less than 60 seconds, all on their own.
When you set concrete goals like these, your entire team—developers, testers, and product managers—gets on the same page. Quality stops being a fuzzy concept and becomes a tangible target everyone is working toward.
A well-defined QA strategy is like a good recipe. It ensures that no matter who is in the kitchen, the final dish comes out consistently delicious every single time. Without it, you're just guessing.
Once your standards are locked in, the next step is to map out exactly how you'll get there.
Create a Clear and Actionable Test Plan#
Think of your test plan as the roadmap for your entire QA effort. It clearly documents what you’ll test, how you'll test it, who’s on the hook for what, and the resources you’ll need. This doesn't have to be a 100-page novel; in fact, a clear and concise plan is far more effective.
A good test plan needs to cover a few key areas:
- Scope of Testing: Be crystal clear about which features and functions will be tested. Just as importantly, define what’s out of scope. This helps manage everyone's expectations and focuses your energy where it matters most.
- Testing Types: Specify the mix of tests you'll run, such as functional, usability, performance, and security testing.
- Device and OS Matrix: You can't test on every device in the world, so pick your battles. Identify the specific devices, operating systems, and screen sizes that are most popular with your target audience and focus there.
- Entry and Exit Criteria: Define the rules of the game. What needs to happen before testing can start (e.g., a feature is "code complete")? And what signals that testing is done (e.g., zero critical bugs remain)?
This plan brings much-needed structure to your mobile app quality assurance and makes sure nothing important slips through the cracks. It also fits perfectly within the early stages of a project, as outlined in this comprehensive guide on the mobile app development process, ensuring QA is an integral part from the very beginning.
Adopt the Shift-Left Approach#
One of the most powerful changes you can make to your QA process is to "shift left." This jargon simply means moving your testing activities much earlier in the development timeline. Instead of waiting for a feature to be completely built, you start testing way back in the design and requirements phase.
Believe it or not, teams that integrate testing throughout the development process waste 22% less time on bug fixes and rework. Why? It's simple: finding and fixing a bug during the design phase is exponentially cheaper and faster than fixing it after it's been coded, tested, and shipped.
Shifting left means your team starts:
- Reviewing designs for potential usability issues.
- Analyzing requirements to spot logical gaps or confusing instructions.
- Writing test cases while the feature is being developed, not after it's done.
This approach creates a culture where quality is everyone's job, not just something the QA team handles at the end. It transforms testing from a final hurdle into a continuous, collaborative effort that dramatically improves your final app.
The Best QA Tools for Modern App Developers#
Look, a great QA strategy is just an idea on a whiteboard without the right software to bring it to life. Think of your toolset as the difference between building a house with your bare hands versus using power tools. The right tools help your quality assurance team test faster, cover more ground, and dig deeper than they ever could manually.
The modern mobile QA toolkit is packed with options for everything from automating mind-numbing, repetitive checks to simulating how your app will perform for users all over the world.
Choosing the perfect tech stack really boils down to your project’s specific needs, your budget, and the skills your team already has. That said, some tools have become industry standards for a good reason—they’re powerful, flexible, and they just work. Let's walk through the essential categories of tools that top-tier development teams use to build those five-star apps we all want.
Automation Frameworks#
Test automation frameworks are the workhorses of any efficient QA process. They let you write scripts that handle the boring stuff automatically—logging in, tapping through screens, and confirming that features behave as expected. This frees up your human testers to focus on the more creative and nuanced work, like exploratory and usability testing where a human touch is irreplaceable.
The two giants in this space are:
- Appium: This is an open-source framework that’s incredibly popular because it lets you write one set of tests for both iOS and Android apps. For teams looking to be as efficient as possible, this cross-platform approach is a game-changer, saving you from maintaining two separate sets of test code.
- Espresso (for Android) & XCUITest (for iOS): These are the official, native testing frameworks from Google and Apple. Because they’re built right into the platforms, they offer super tight integration, which often means faster and more reliable tests for apps that are specific to one OS.
This screenshot from the Appium homepage perfectly captures its main selling point: testing across different platforms with a single codebase.
The image drives home the ability to write tests once and run them on native, hybrid, and mobile web apps. For any dev team, that’s a massive time-saver.
Bug Tracking and Project Management#
Finding a bug is only half the job. You also need a solid system to track it, prioritize it, and make sure it gets squashed. This is where bug tracking platforms come in. They act as the central command center for your QA and development teams, ensuring no issue ever slips through the cracks.
Jira is the undisputed king here. Teams of all sizes use it to manage everything from simple bug reports to complex project workflows. It creates a clear, shared dashboard showing exactly what needs fixing, who's on it, and where it is in the process.
Using these tools effectively is one of the 9 essential mobile development best practices because it brings much-needed order and transparency to the often chaotic world of bug fixing.
Performance Monitoring and Device Farms#
A slow, battery-hogging app is a dead app. Performance monitoring tools are your best friend for making sure your app is snappy and efficient. They help you measure crucial metrics like load times, memory usage, and network activity, letting you find and fix bottlenecks before your users ever notice them.
Finally, you absolutely have to test on real devices. Cloud device farms like BrowserStack or Sauce Labs give you remote access to hundreds of actual iOS and Android devices. This lets you check for weird compatibility bugs across a huge range of phones and tablets without the massive cost and headache of buying and maintaining your own physical device lab.
By combining these tools, you build a comprehensive safety net that proves you’re serious about mobile app quality assurance.
QA Strategies for NextNative Applications#

When you're building a NextNative project, you can't just slap a standard mobile app quality assurance plan on it and call it a day. The whole game changes. You’re not just testing a website or a traditional native app; you're dealing with a clever hybrid, and your QA strategy needs to reflect that.
Think of it like inspecting a high-tech aquarium. You wouldn't just check if the glass tank is solid (the native shell) or only test the water quality (the web view). For everything to work, the entire ecosystem has to be in perfect balance. You need to know the glass won't leak, the water temperature is just right, and the fish can smoothly interact with the little treasure chest that opens and closes. A failure in any one part spoils the whole thing.
This means your testing has to cover two distinct layers that are constantly working together: the native shell built with Capacitor and the web-based content running inside a web view. You have to validate that native device features like push notifications and camera access are flawless, while also making sure your web UI is snappy and looks great inside its mobile frame.
Testing the Bridge Between Worlds#
The most critical—and often trickiest—part of NextNative QA is testing the "bridge." This is the invisible communication layer that lets your web code talk to the device's native features. It's a common hiding spot for some of the most frustrating bugs, so you have to be meticulous here.
For example, imagine your web UI has a button to upload a profile picture. When the user taps it, a lot has to happen perfectly:
- The web view has to register the tap instantly.
- The call to the native module (to open the photo gallery) must be sent without a hitch.
- The native photo picker needs to slide into view smoothly.
- After the user picks a photo, the data has to travel back from the native side to your web view correctly.
The goal is to make the transition between web and native so seamless that the user can't even tell it's happening. A great NextNative app feels like one cohesive experience, not a website crammed into a native box.
Performance Testing for Hybrid Apps#
When it comes to performance, NextNative apps demand a unique focus. Of course, you’ll check the usual suspects like launch time and memory usage. But you absolutely must obsess over the web view's rendering speed. A slow-loading web element can make the entire app feel sluggish, even if the native parts are lightning-fast.
Here are the key performance indicators you need to track:
- Initial Page Load: How fast does your content show up after the splash screen? Even a slight delay here can make users antsy.
- Interaction Latency: When a user taps a button in the web part of your app, how long does it take to get a visual response? This is what makes an app feel responsive.
- Bridge Call Overhead: You need to measure the round-trip time for a signal to go from the web layer to the native layer and back. Inefficient bridge calls create a noticeable lag that feels clunky.
Nailing down your testing schedule is crucial for catching these performance bottlenecks early. We break down how QA fits into the bigger picture in our guide to the mobile app development timeline. Planning for these specific hybrid tests ahead of time can save you from last-minute headaches before launch.
Common Mistakes to Avoid#
As you map out your NextNative QA process, try to sidestep these common pitfalls. Overlooking them is a surefire way to create a poor user experience and a backlog of bug reports after you go live.
- Testing Only on Emulators: Emulators are great, but they can't mimic real-world chaos like spotty Wi-Fi, a dying battery, or an incoming phone call. Real-device testing is non-negotiable.
- Ignoring Web View Performance: It’s easy to get tunnel vision on native performance metrics, but that's a huge mistake. A slow or janky web view will sink the user experience, period.
- Forgetting Platform Differences: The web view on iOS (WKWebView) and Android (WebView) aren't identical. They have their own little quirks. If you don't test thoroughly on both platforms, you risk releasing platform-specific bugs that will alienate half your users.
Common Questions About Mobile App QA#
As you start piecing together your quality assurance plan, a few questions always seem to pop up. Let's cut through the noise and get straight to the practical answers that will help your team move forward with confidence.
These aren't just textbook definitions; this is real-world advice you can put to work, whether you're a scrappy startup or a large enterprise.
How Much Should I Budget for Mobile App QA?#
There isn't a single magic number, but a solid rule of thumb is to earmark 15-30% of your total development cost for quality assurance. It's tempting to see this as just another expense, but it's truly an investment in your app's reputation and long-term success.
Think about it: the cost of finding and squashing a bug early on is peanuts compared to fixing it after your app is live. Post-launch fixes aren't just about code; they involve reputation management, emergency patches, and trying to win back users who've already left a one-star review. Proactive QA is always the cheaper route.
How Can a Small Team Start with Quality Assurance?#
If you're a small team or even a solo developer, don't let the idea of QA intimidate you. You don't need a huge, dedicated department to make a real impact. The trick is to start small and focus on the essentials.
Begin by mapping out the most critical journeys in your app—things like the user sign-up flow or the main checkout process. From there, you can write simple manual test cases for these core functions and track any bugs you find in something as simple as a spreadsheet or a Trello board. The goal is to build a culture where everyone owns quality, right from the start.
What Is the Difference Between QA and QC?#
It's easy to get these two mixed up, as people often use them interchangeably. But they're actually two different sides of the same coin.
Quality Assurance (QA) is all about being proactive. It focuses on preventing defects by setting up the right processes, standards, and workflows from the very beginning. Think of it as creating the perfect recipe before you start cooking.
Quality Control (QC), on the other hand, is reactive. Its job is to find defects in the finished product. This involves the hands-on testing and inspection of the app to catch bugs before they ever get to your users. Simply put, QA designs the quality system, while QC inspects the final product.
How Often Should We Run Tests?#
Testing should never be a last-minute scramble right before launch. To get the best results, it needs to be a constant, humming engine within your development cycle. A great rhythm involves running automated tests with every new code commit, or at the very least, on a daily basis.
This approach is often called continuous testing. It helps you catch bugs the moment they’re created, which makes them far faster, easier, and cheaper to fix. This continuous process should also include security checks. You can learn more about how to protect your app in our guide to mobile app security best practices. This ensures your app is not just working perfectly, but is also safe and secure.
Ready to build a high-quality mobile app without the native development headache? NextNative provides production-ready boilerplates and a unified toolkit for Next.js developers, helping you launch faster and focus on what matters. Start building your five-star app today at https://nextnative.dev.